First Calibration
This page will show you what you need to do to run your first calibration. You should have the software installed and ready to go, but if you're not in that position head to the guides below to help you get set up.
- If you've just got your boxed copy of FoCal and are unsure what to do, have a look here for information.
- If you want more information about installation, head here for Windows or here for Mac install instructions.
Contents of this page
- Setting up for your calibration
- Lighting Setup
- Camera and Lens Setup
- Starting FoCal and Target Setup
- Calibration
Setting up for your calibration
You're going to need a few things to get going with the calibration:
Your camera and the lens you want to calibrate
- A USB cable to connect your camera to the computer - this is usually supplied with the camera.
- A sturdy tripod
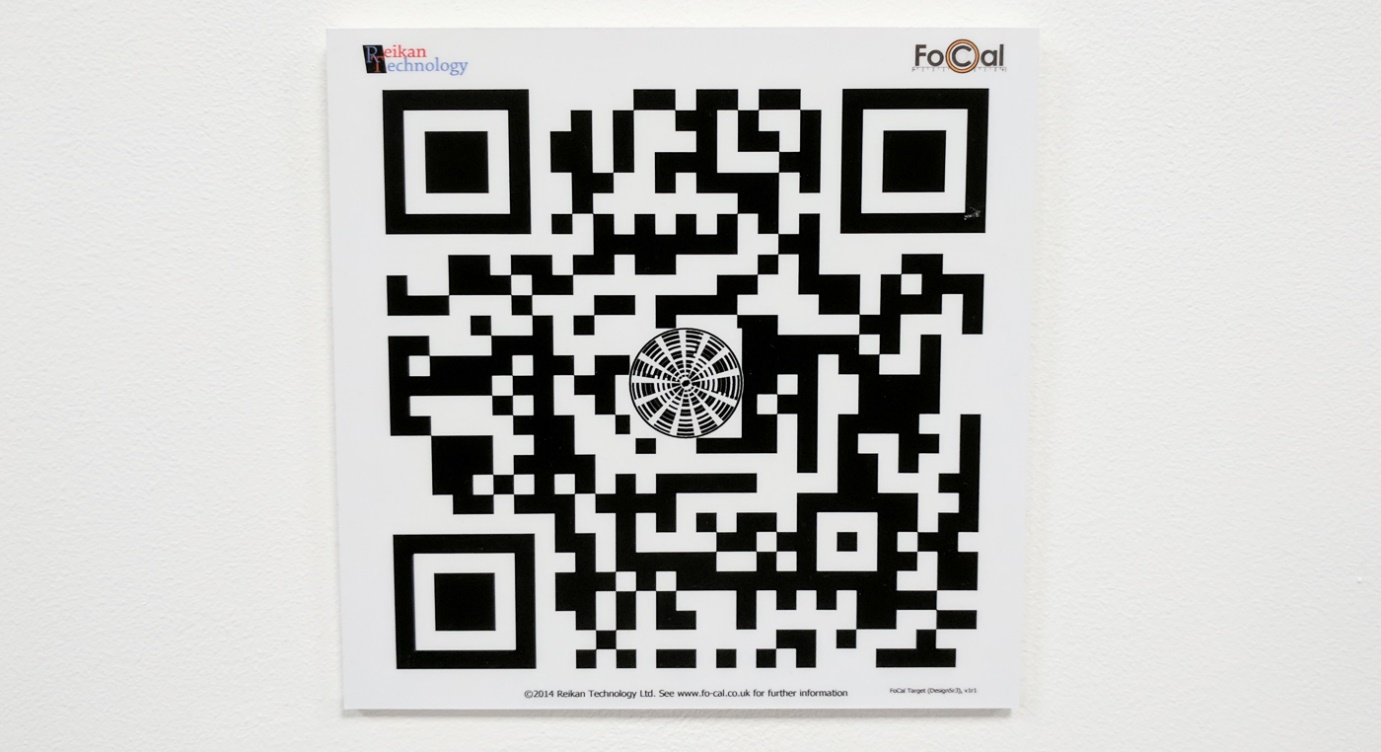
- A FoCal target - either a FoCal Hard target like the one supplied in the box or available from the FoCal Store, or a target image printed on quality paper.
You'll need to attach the target to a flat, vertical wall and aim the camera at the target, so pick a height at which you can easily aim the tripod mounted camera.
The distance between the camera and the target is important for a good calibration. If the camera is too close to the target, the results of the calibration won't be as good for general shooting.
The Target Distance Tool will help you choose the right distance, but here are some examples for common lens focal lengths:
| Focal Length | Recommended Minimum Distance |
|---|---|
| 16mm | 0.8m (2 foot 7 inches) |
| 24mm | 1.2m (3 foot 11 inches) |
| 50mm | 2.5m (8 foot 2 inches) |
| 70mm | 3.5m (11 foot 5 inches) |
| 200mm | 5.5m (18 foot) |
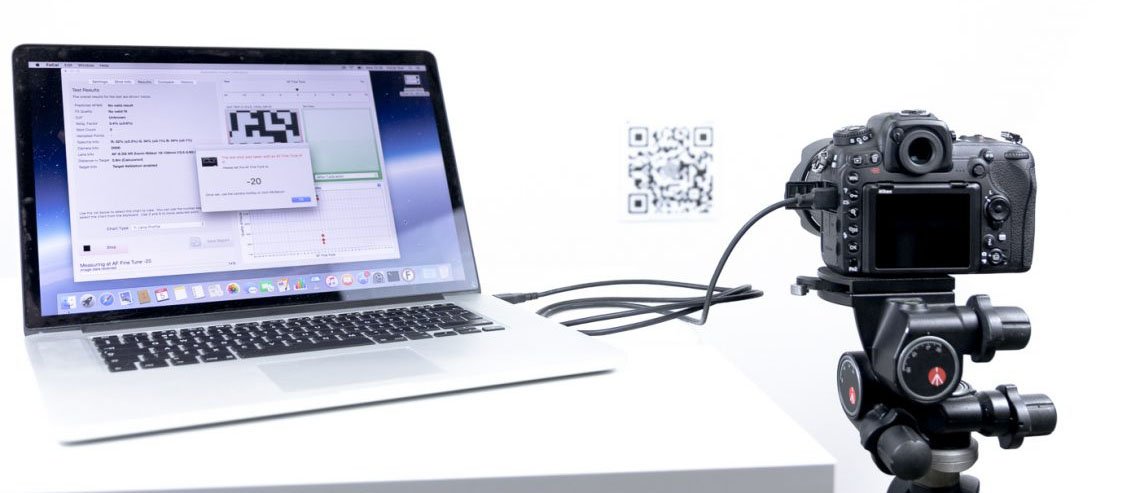
Your camera will also need to be close enough to your computer to be able to plug in the USB cable. If you're using a laptop this won't usually be a problem, but if you have a desktop then consider this when choosing a calibration location. You can use a USB extension cable but, in our experience, these can cause some problems with reliability and we wouldn't advise it unless you have no other choice.
Lighting
The purpose of the calibration is to make sure that the AF system of your camera and lens is working together perfectly. To be able to do this, we need the AF system to work to the best of its ability, and for this we need plenty of light on the target.
FoCal will check the lighting level before running a test and you can adjust if necessary, so pick a location to start with and you will check to make sure it's OK with FoCal before you calibrate (this is covered below).
The best setup is to have the target in a well lit room. If FoCal is warning you that the light level is too low, you can supplement the lighting on the target with a constant light source. It's best to avoid fluorescent or cheap LED lighting as these can flicker and cause problems with calibration.
Outdoors initially sounds like a good idea, but any wind can disturb the setup and clouds can change the light level during the test and cause calibration problems, so we wouldn't recommend this.
Camera and Lens
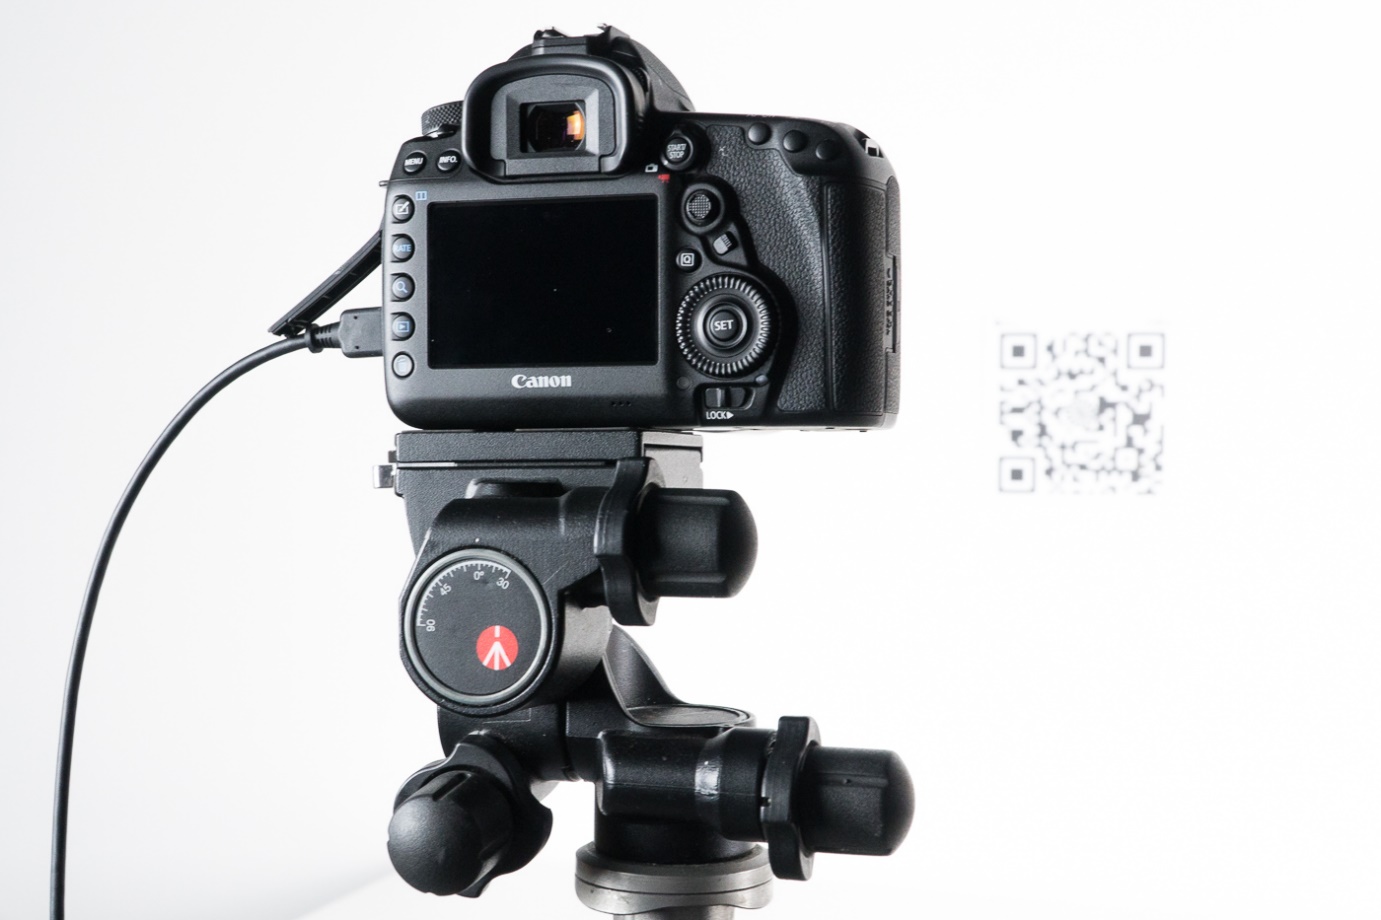
The camera should be on a sturdy tripod, aimed at the target at the appropriate distance away. If you usually use a battery grip, it should be removed for calibration as it can increase vibration and reduce the quality of the calibration results.
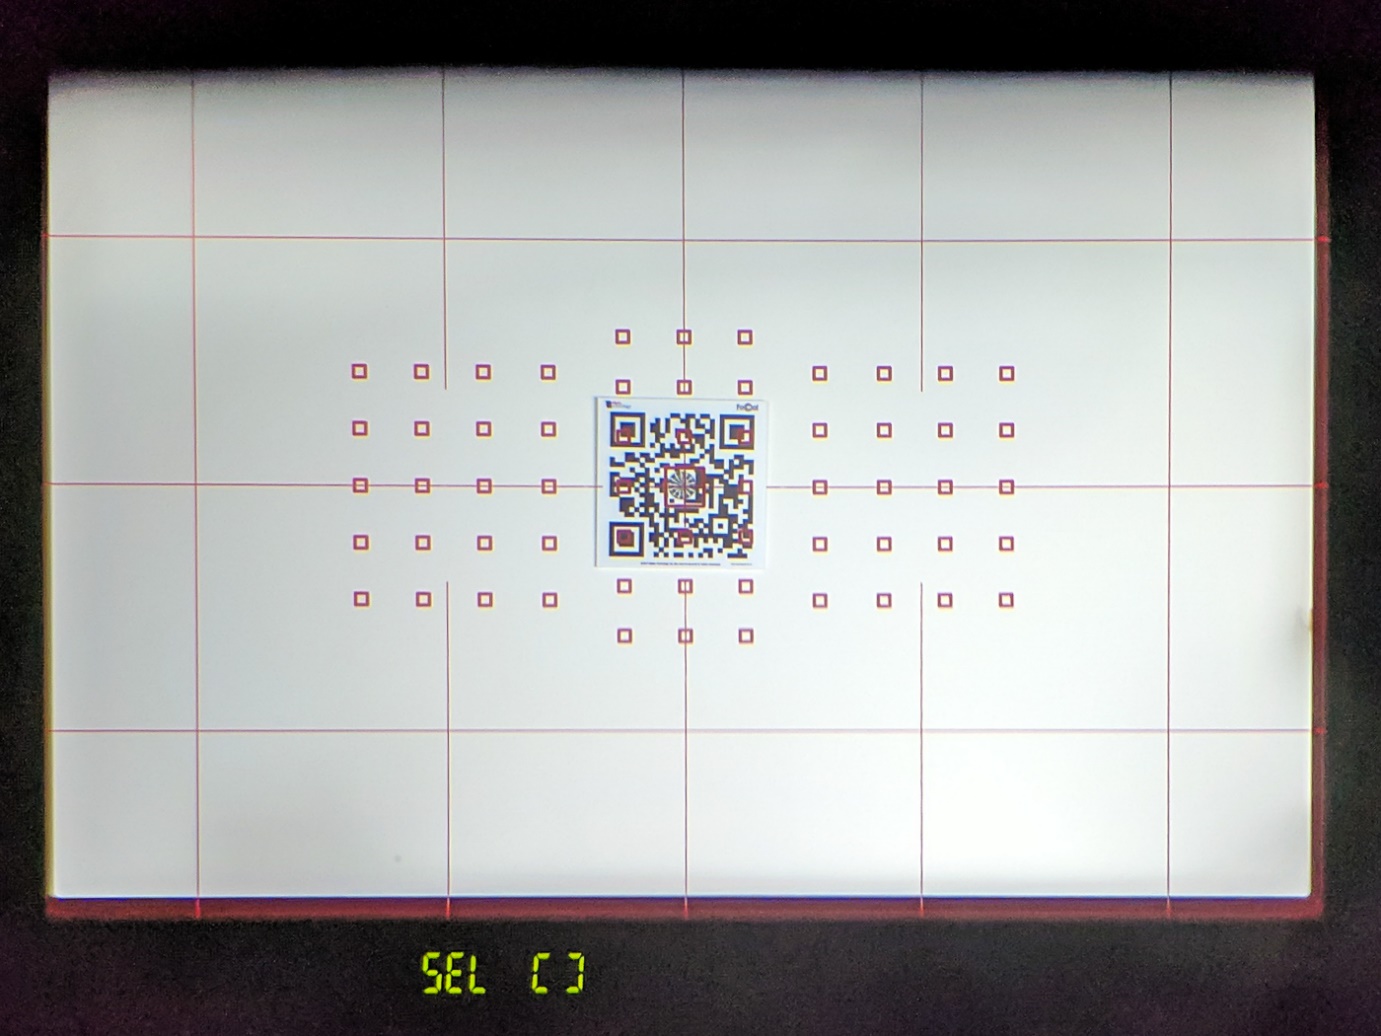
Look through the viewfinder and approximately line the centre focus point with the centre circle of the target. It doesn't have to be absolutely perfect - if you're too away from the middle then FoCal will warn you when you check the Target Setup (explained below).
The USB cable should be connected to the camera and the computer.
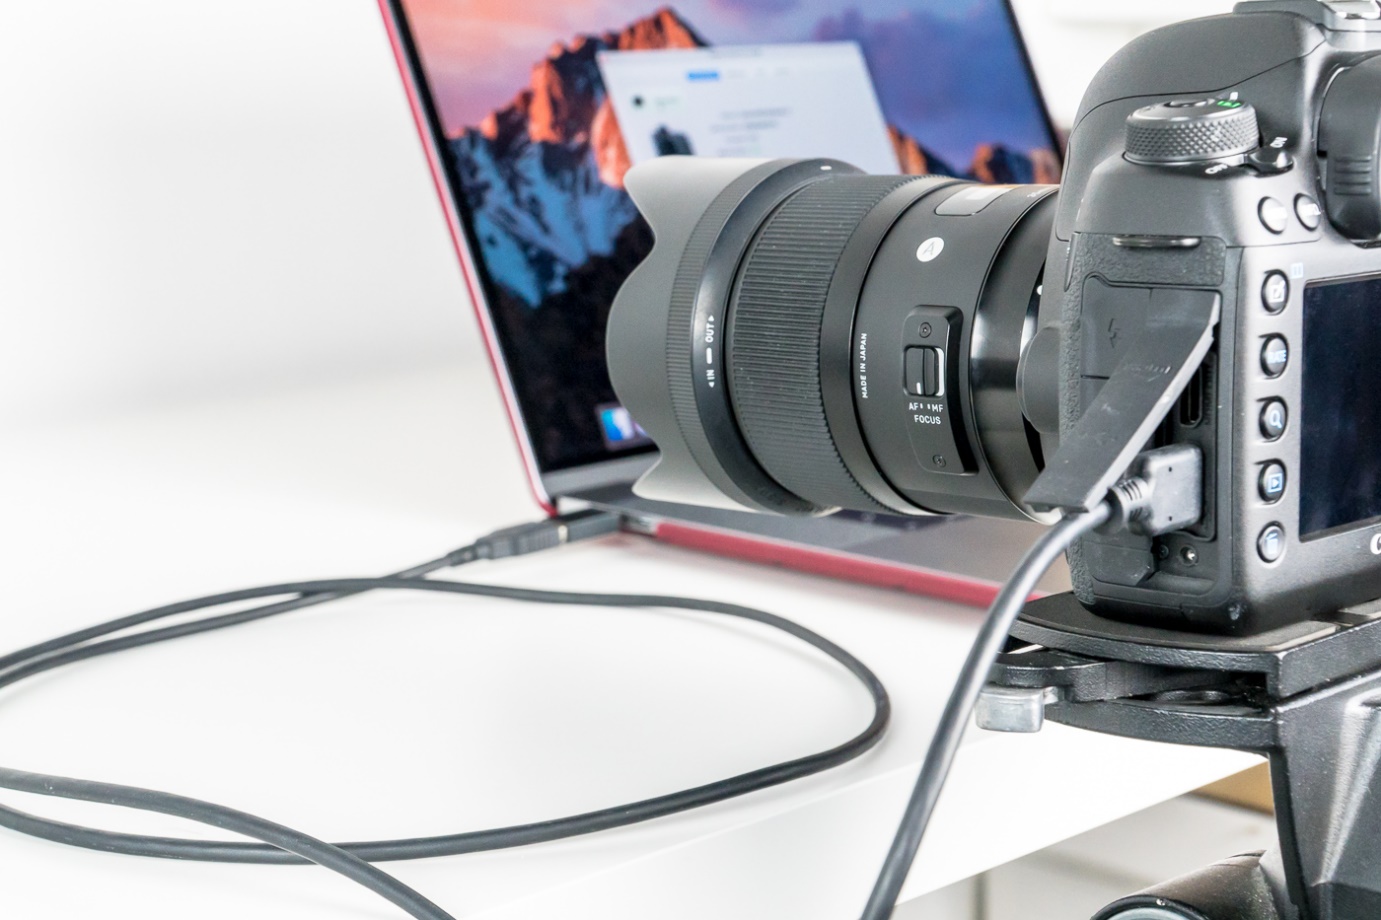
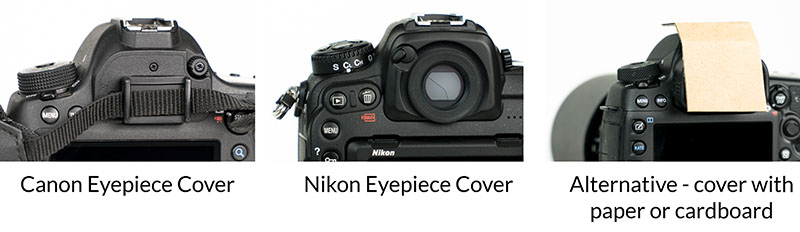
For the very best results, it's a good idea to cover the viewfinder of the camera. The camera is usually used with a human head stopping light from entering the viewfinder, but this isn't the case when running with FoCal and stray light can upset the metering system and cause calibration problems.
Some cameras have a built in switch to cover the eyepiece, while others may have an attachment on the strap that can cover the eyepiece. If you have neither, a piece of dark paper hung over the back of the camera will suffice.
Camera and Lens Settings
FoCal takes control of the camera and can change most settings, but there are a few final things worth checking before starting:
- Canon: Switch the camera mode dial to Av and the shooting mode to ONE SHOT.
- Nikon: Switch the camera mode dial to A and the shooting mode to AF-S.
- Ensure Image Stabilisation is disabled if the lens supports it
- Ensure the focus limiter is not enabled if your lens supports it
Recap
You should be ready to go now. Have a quick look at the checklist below just to make sure:
- Camera is on a sturdy tripod with no battery grip attached
- USB cable is connected between the camera and the computer
- The eyepiece of the camera is covered
- Target is mounted on a flat, vertical wall the correct distance from the camera.
Fire up FoCal!
We'll show this on Windows, but the process is the same on macOS. This is also with FoCal Pro, but all the options described are available in FoCal Plus as well.
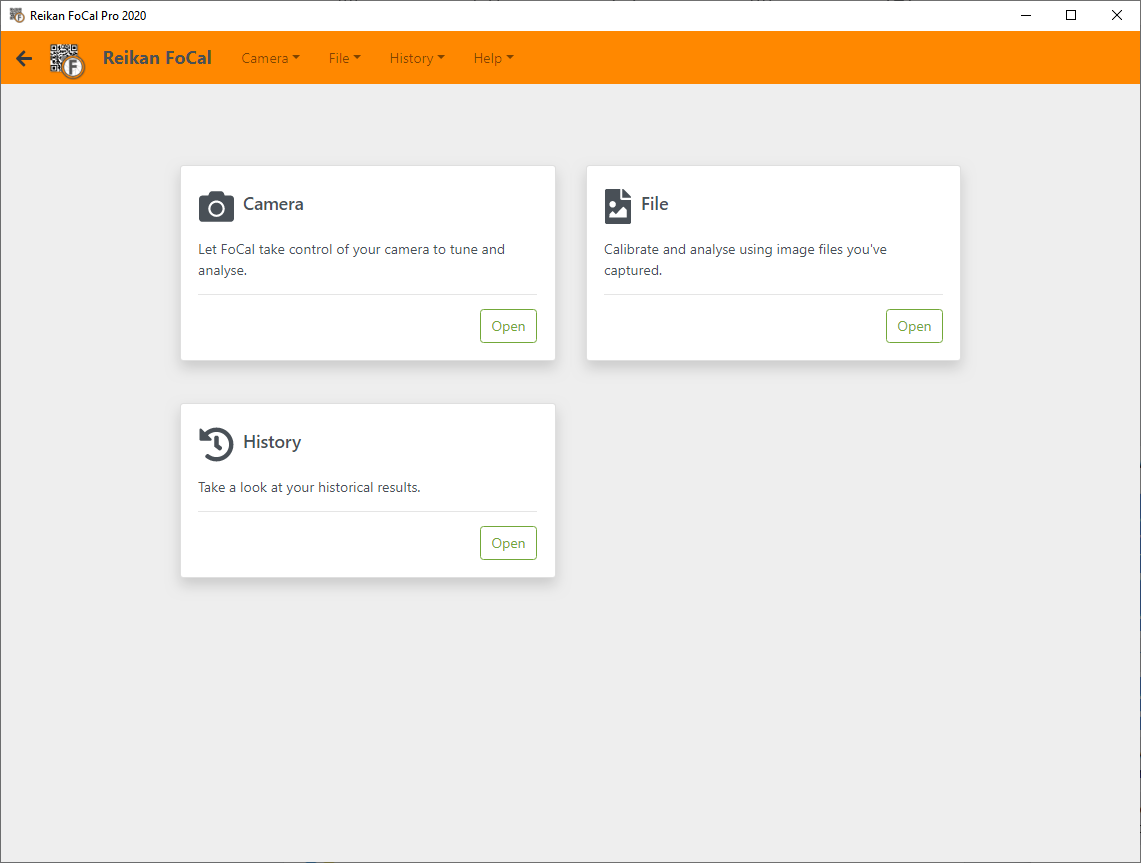
With all the equipment in place, you can start the FoCal software (see the bottom of the Windows or Mac page if you're not sure how to start the application).
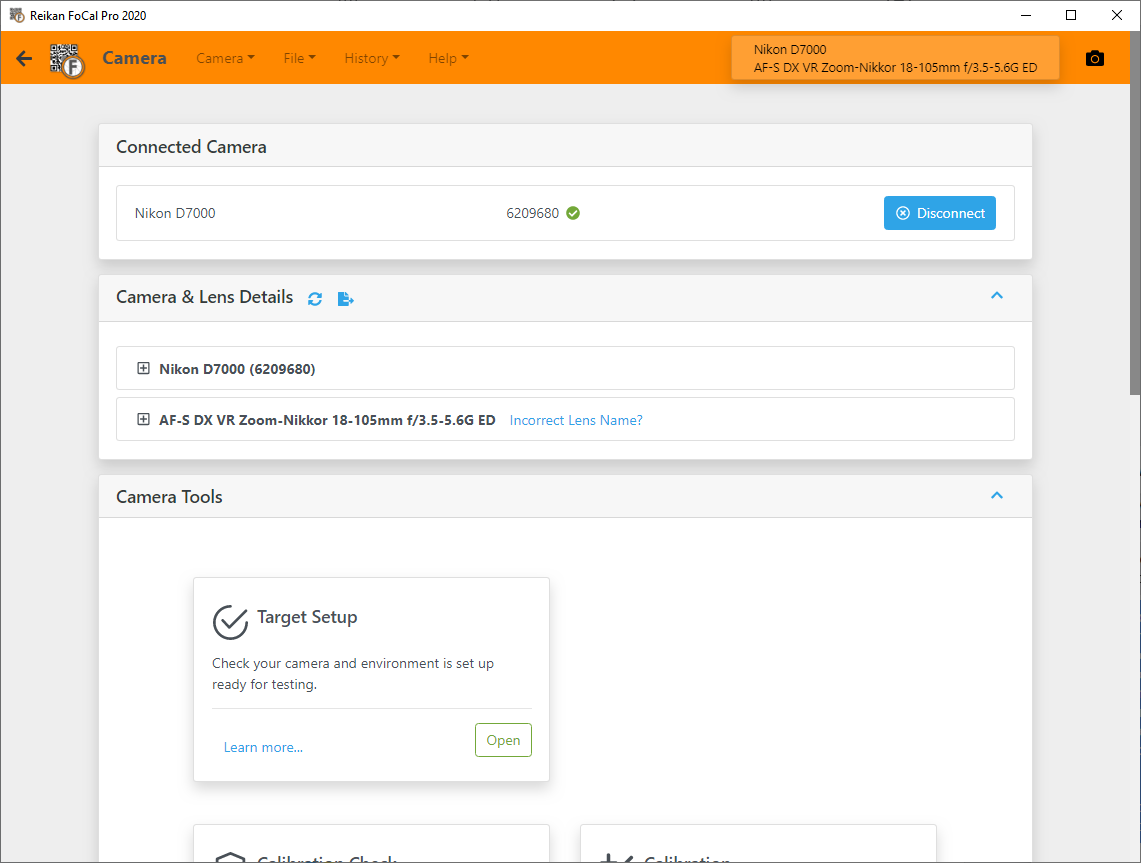
Go to the Camera page:
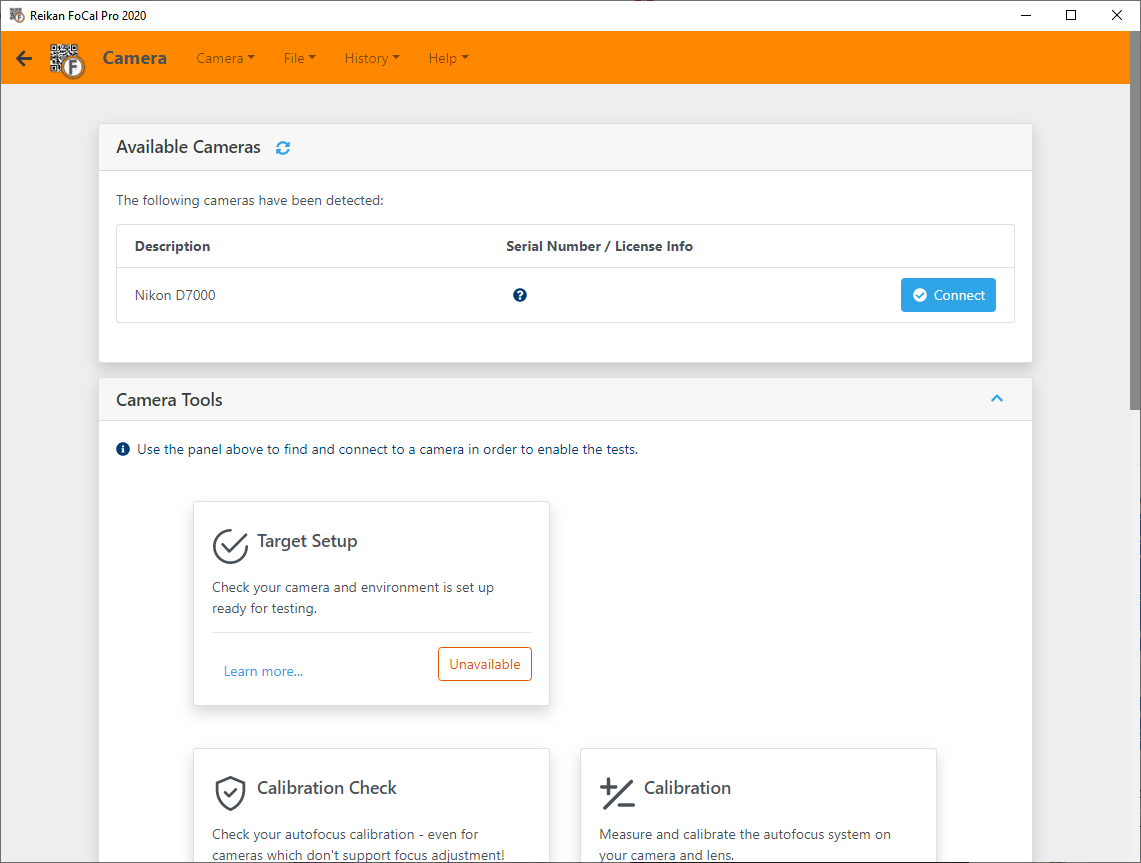
Make sure the camera is turned on and connected to the computer and you should see the Description shown as in the image above (if you don’t see this, hit the small blue refresh icon by the Available Cameras text to check again).
If this is a camera that hasn’t been seen by FoCal before, the Serial Number / License Info column will show a question mark (as shown in the image above), otherwise it will show the camera serial number and whether it’s been added to your license.
Hit the Connect button to start communicating with the camera. A shot will be taken and after a few seconds you should see information about the camera and lens:
Checking your Environment
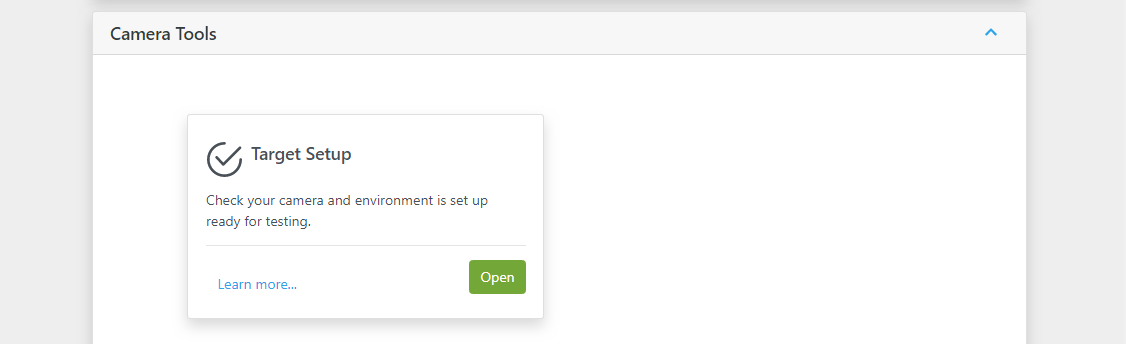
Once connected, the first step is to verify that FoCal is happy with the setup for the test. To do this, you'll use the Target Setup tool. In the Camera Tools panel, hit the Open button in the Target Setup card:
This will open the Target Setup tool:
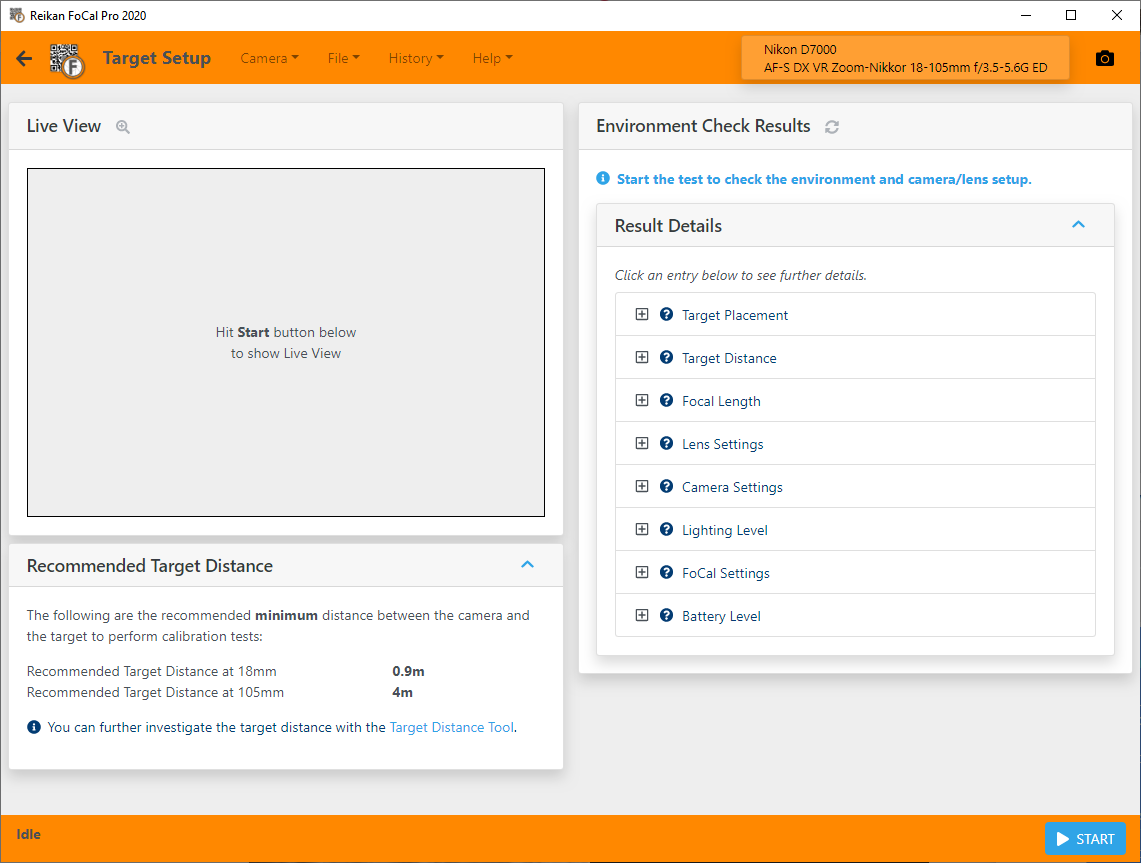
The Recommended Target Distance panel gives you an idea of the minimum distance between the camera and target, but don’t worry too much about this – Target Setup will tell you if the camera and target are too near to each other.
Hit the Start button to begin the check.
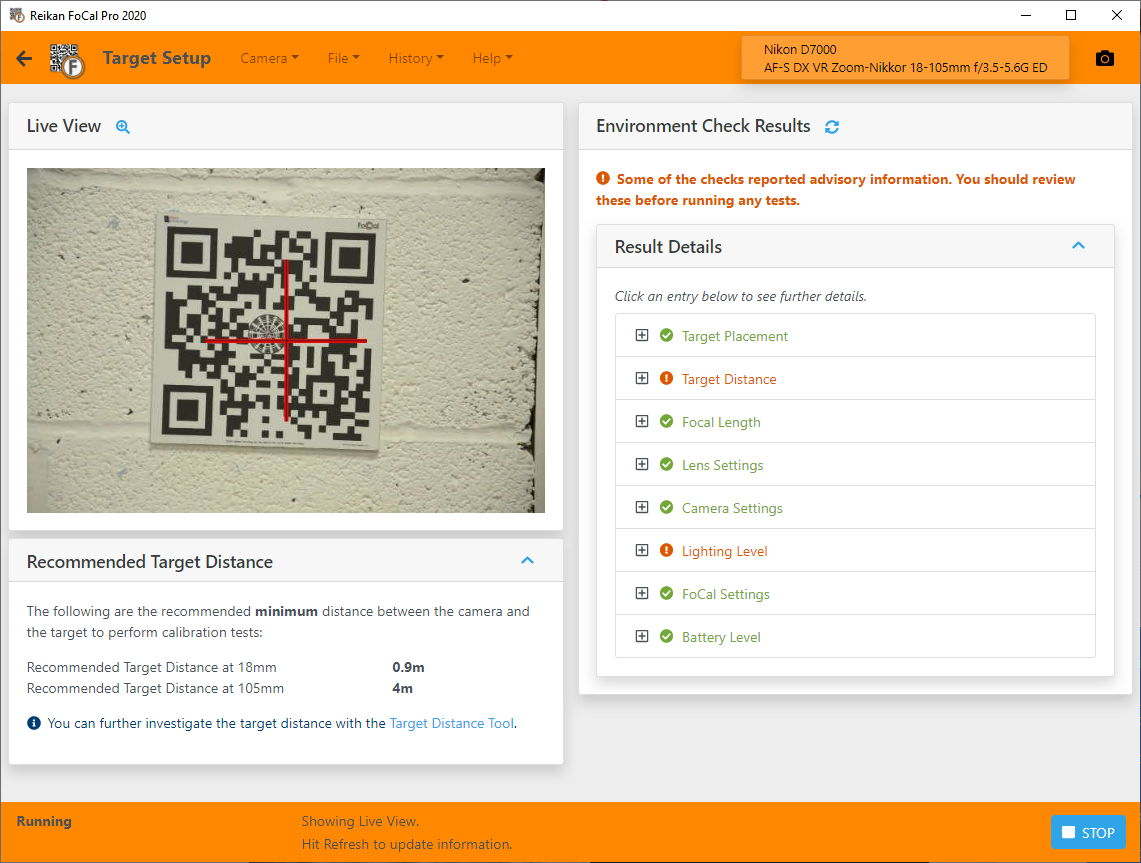
The Target Setup tool will take a photo and analyse to determine if the setup is suitable for calibration. The results will be shown in the Environment Check Results panel, and a live video image will be shown in the main window to help with any position adjustments that might be needed.
Any issues are highlighted with a  or
or  . Click on any entry to see more information:
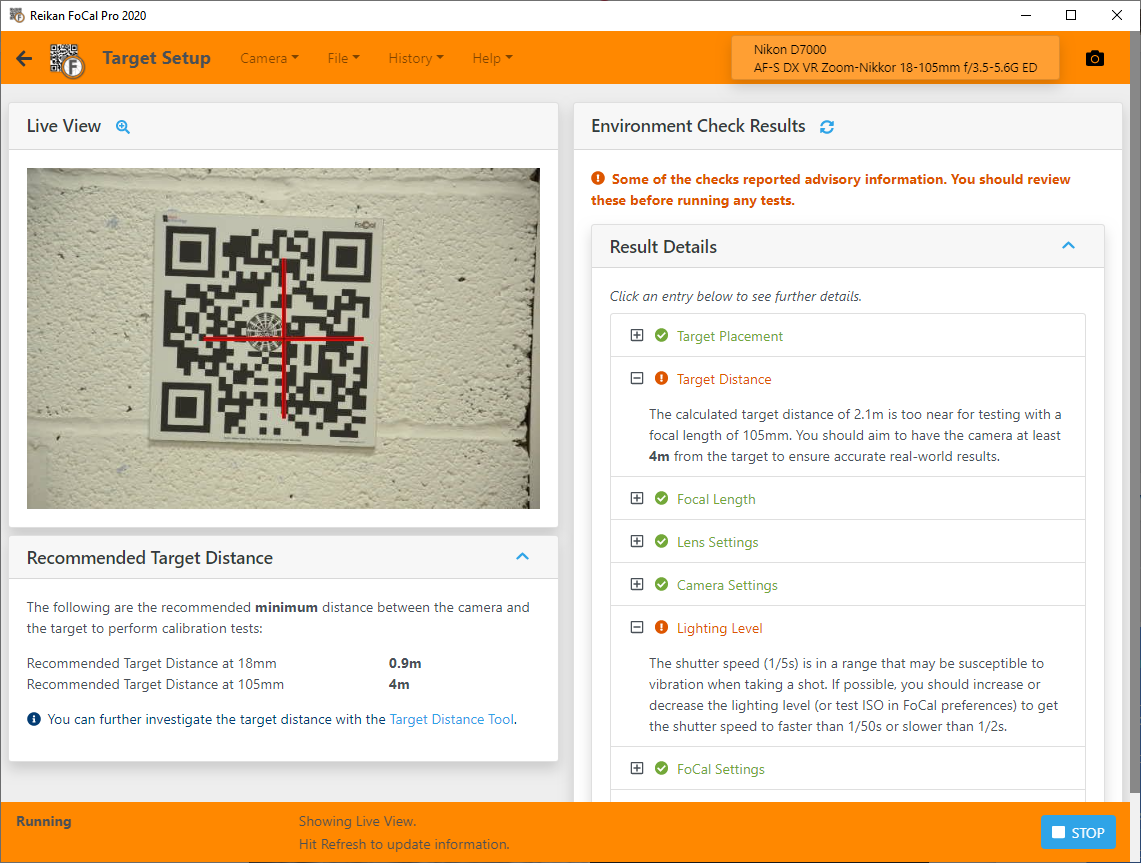
Any entries marked with a  are highlighting things that FoCal cannot check, so just have a quick glance and make sure the listed item is set as it should be in the details.
If there are any issues you should adjust your set up and hit the small blue refresh icon after the Environment Check Results title to update.
When everything is set up correctly (there are no  or
or  entries), you can hit the Stop button and close the Target Setup window, confident that everything is set up perfectly for your first calibration.
Let's Get Calibrating!
Now we've checked everything is setup correctly, calibration is just a matter of starting the Calibration test.
To open the tool, you can use the Camera > Calibration menu option. This will switch to the Calibration page:
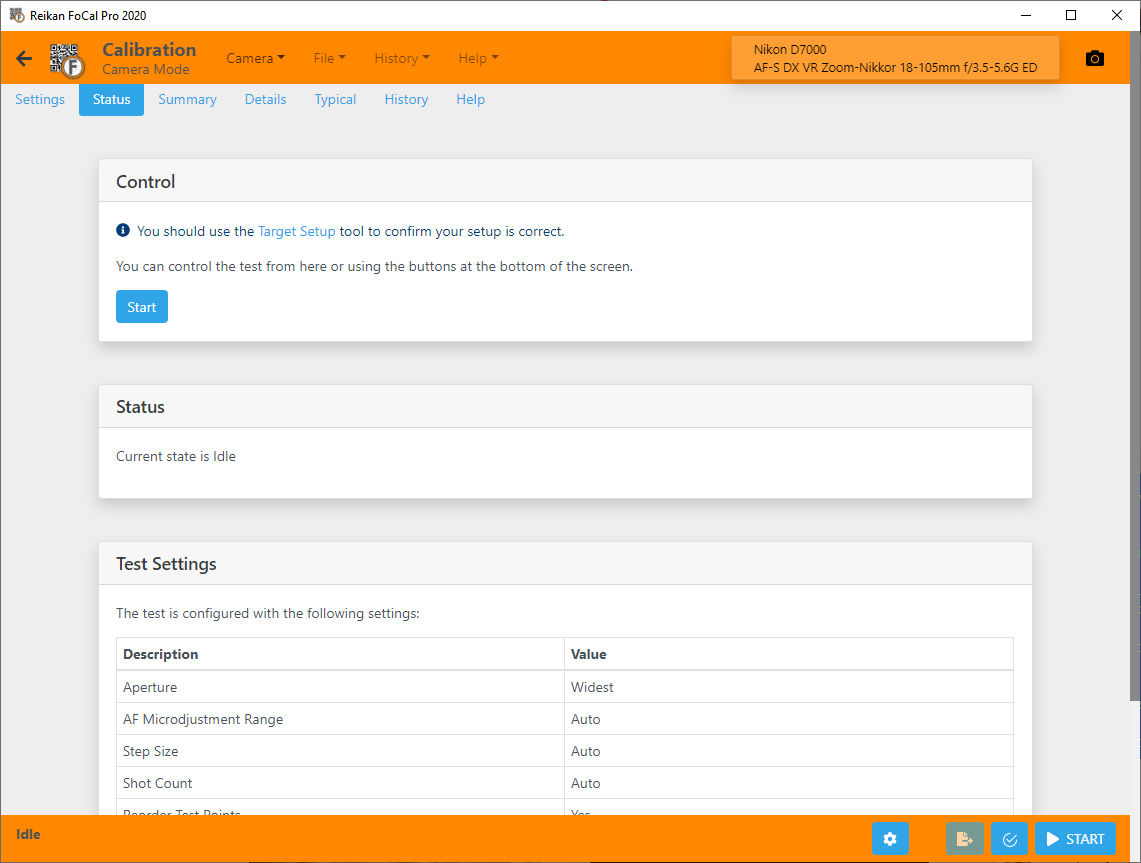
As we've already checked the setup, you can ignore the Target Setup link and head straight down and hit the Start button.
If you've got a Hands Free Mode camera, you can sit back and watch the calibration happen. If your camera is a User Assisted Mode camera, you'll get occasional prompts to change the calibration value on the camera, like this one:
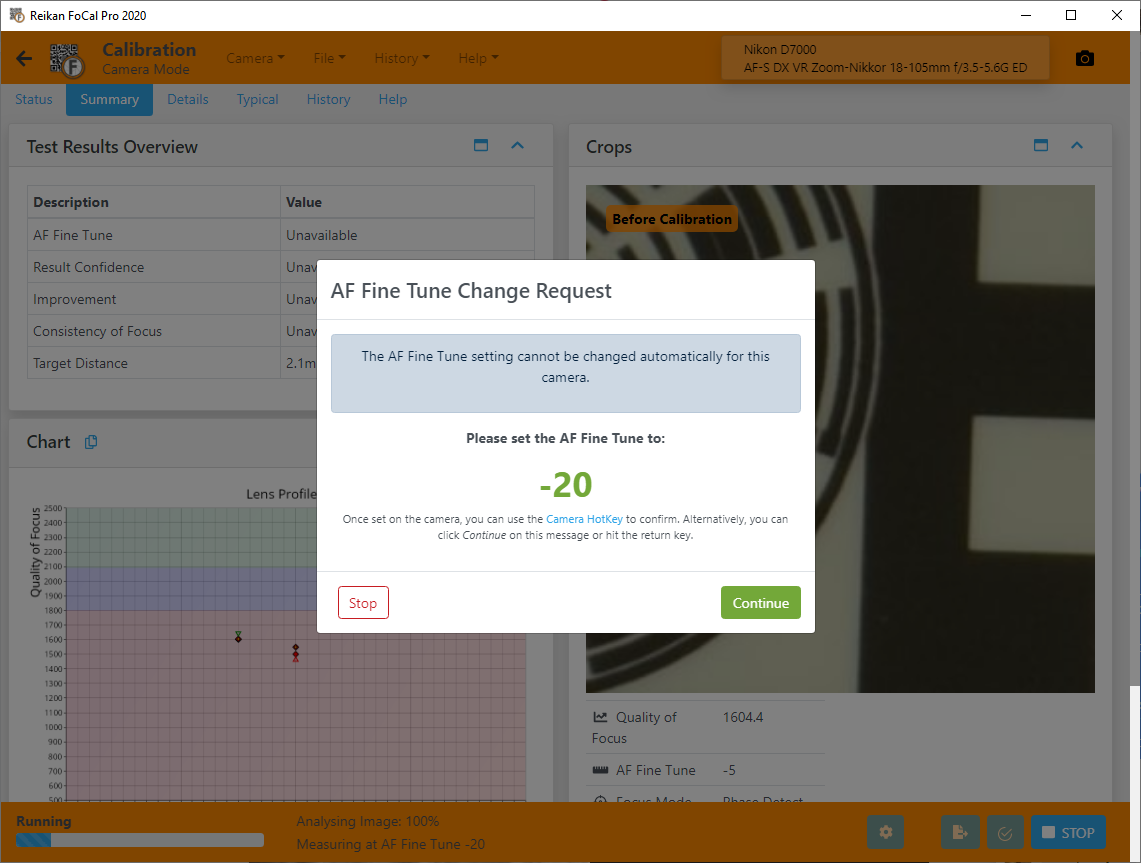
Change the value on the camera and hit OK on the computer to continue. (When you're more familiar with FoCal, have a look at Voice Prompts and Camera Hotkey in the UAM Help section for a quick and easy way to make these adjustments at the camera).
Autofocus. Fixed.
The test will run through to the end, and when complete will show you the Calibration result:
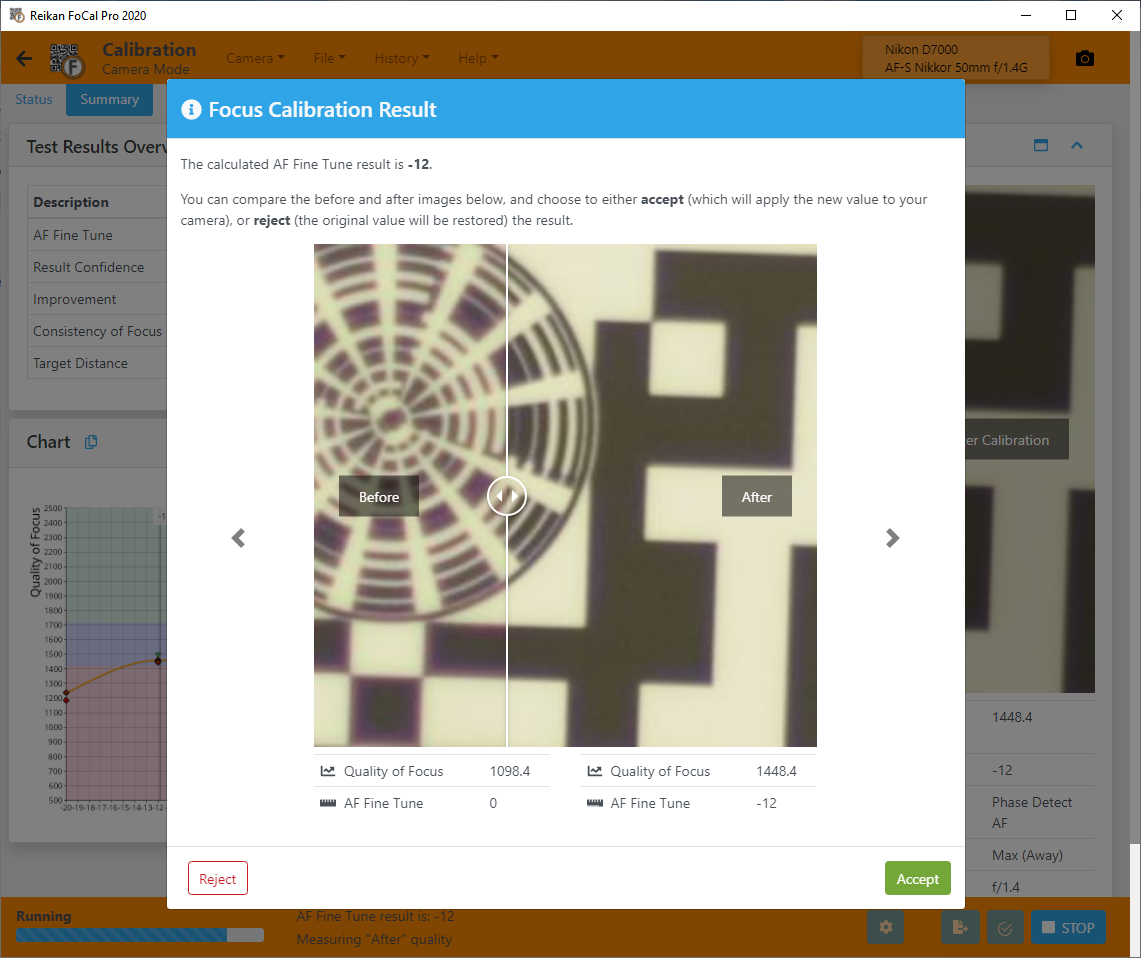
You can drag the slider on the image left/right to compare the before and after images, check the quality values and accept the result if you’re happy.
If you’re interested, you can review information in the Summary tab, or with FoCal Pro you can dig into Details (all the numbers and charts!), Typical (comparison with other users of the same equipment), History (your previous tests) and more.
The camera will now be adjusted to work as well as possible with this lens, so you can close FoCal, disconnect the camera and go out shooting sharper photos!