Connecting to FoCal
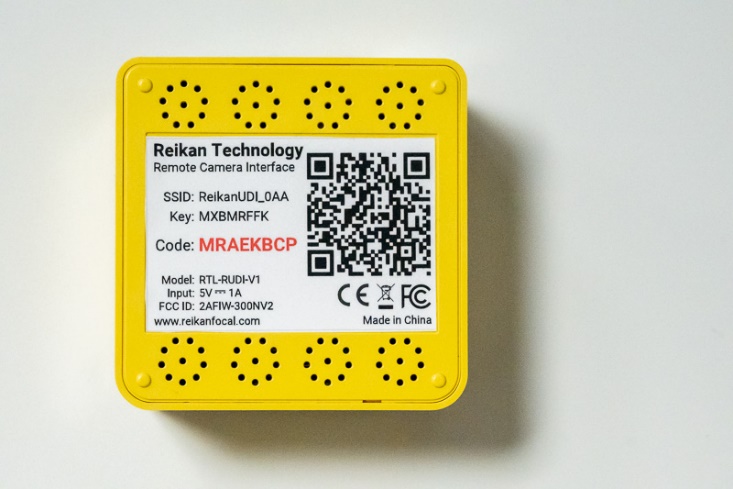
The Wireless Camera Module broadcasts its own WiFi network, the details of which are indicated on the sticker on the base of the unit:
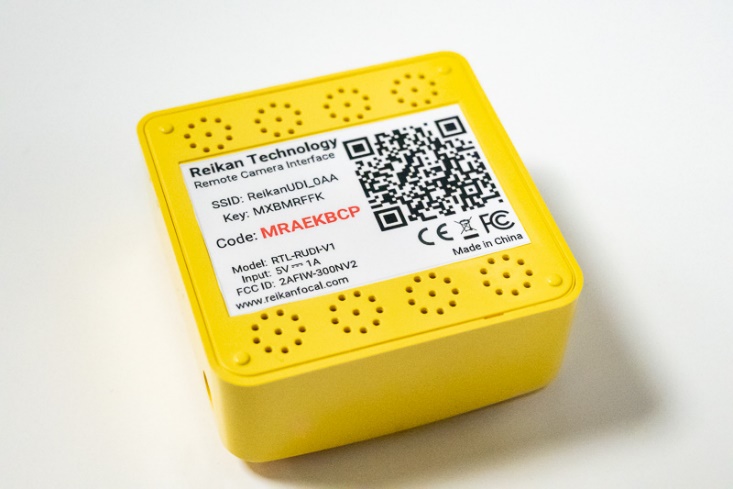
The SSID is the name of the WiFi network that will show up on your computer, and the Key is the password required to connect to the WiFi network.
In the example, above the WiFi network is ReikanUDI_0AA and the key is MXBMRFFK.
Connecting to the WiFi Network
Open the WiFi settings on your computer, choose the network starting ReikanUDI and connect using the key shown on the base of the wireless module.

Note: If the wireless interface on your computer is your only source of connection to the internet (i.e., you do not have a wired network connection or multiple WiFi cards) then you will lose connection to the internet while you are connected to the Wireless Camera Module.
This may become an issue if you try to connect to an unlicensed camera using the Wireless Module – FoCal will try to add the camera to your license, but will not be able to contact the license server. The best way around this is to ensure the camera is licensed by connecting to your computer before you use it with the Wireless Module. (Note this will not be an issue for Commercial licenses)
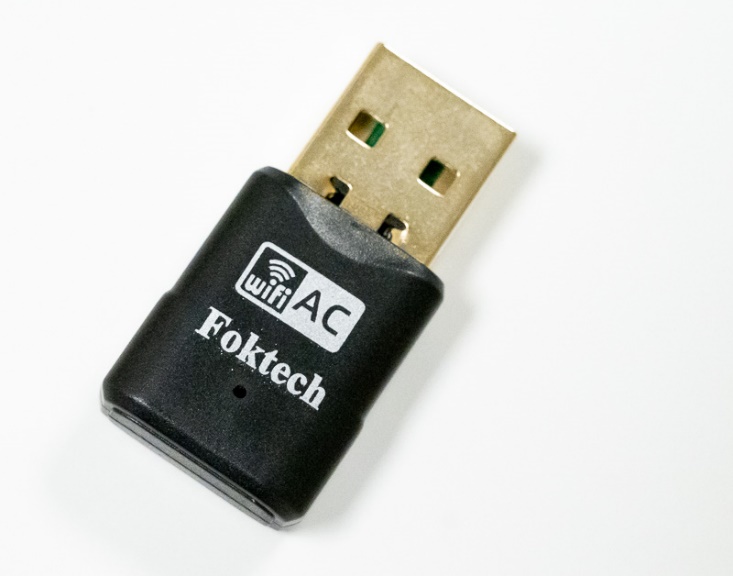
If this is an issue, you can purchase a low-cost USB WiFi adapter which will work with both Mac and Windows computers and allow you to connect to both your home/work internet and the Wireless Camera Module.
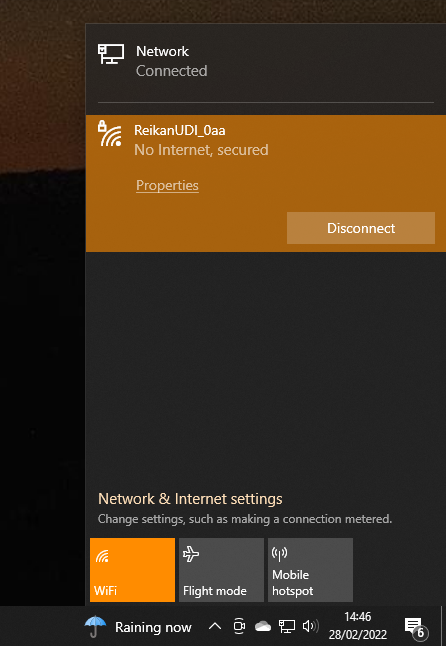
When you are successfully connected to the Wireless Camera Module, you should see an indication in the WiFi properties of your computer.
On Windows, the network will be indicated (correctly) as having No Internet.
For future uses of the Wireless Camera Module, you will not need to enter the password, but you will most likely need to manually connect by selecting the network from the Wireless settings on your operating system.
Connecting to FoCal
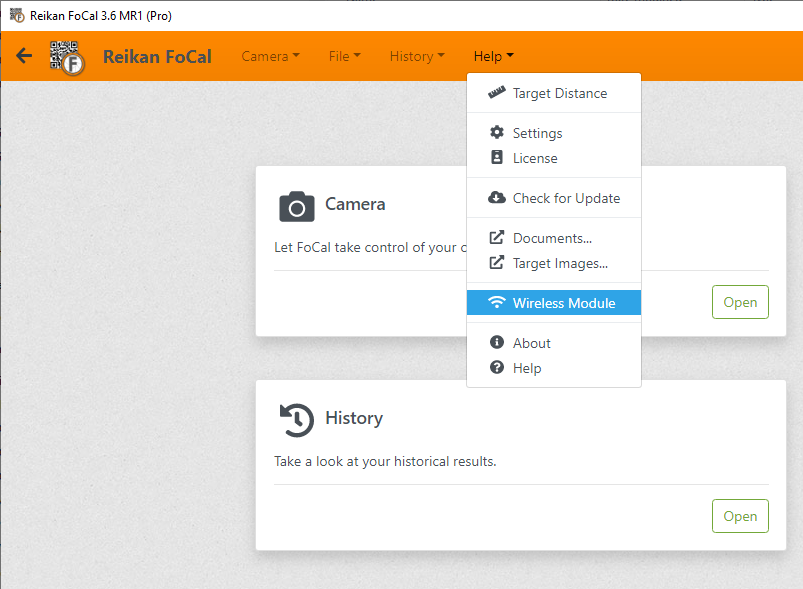
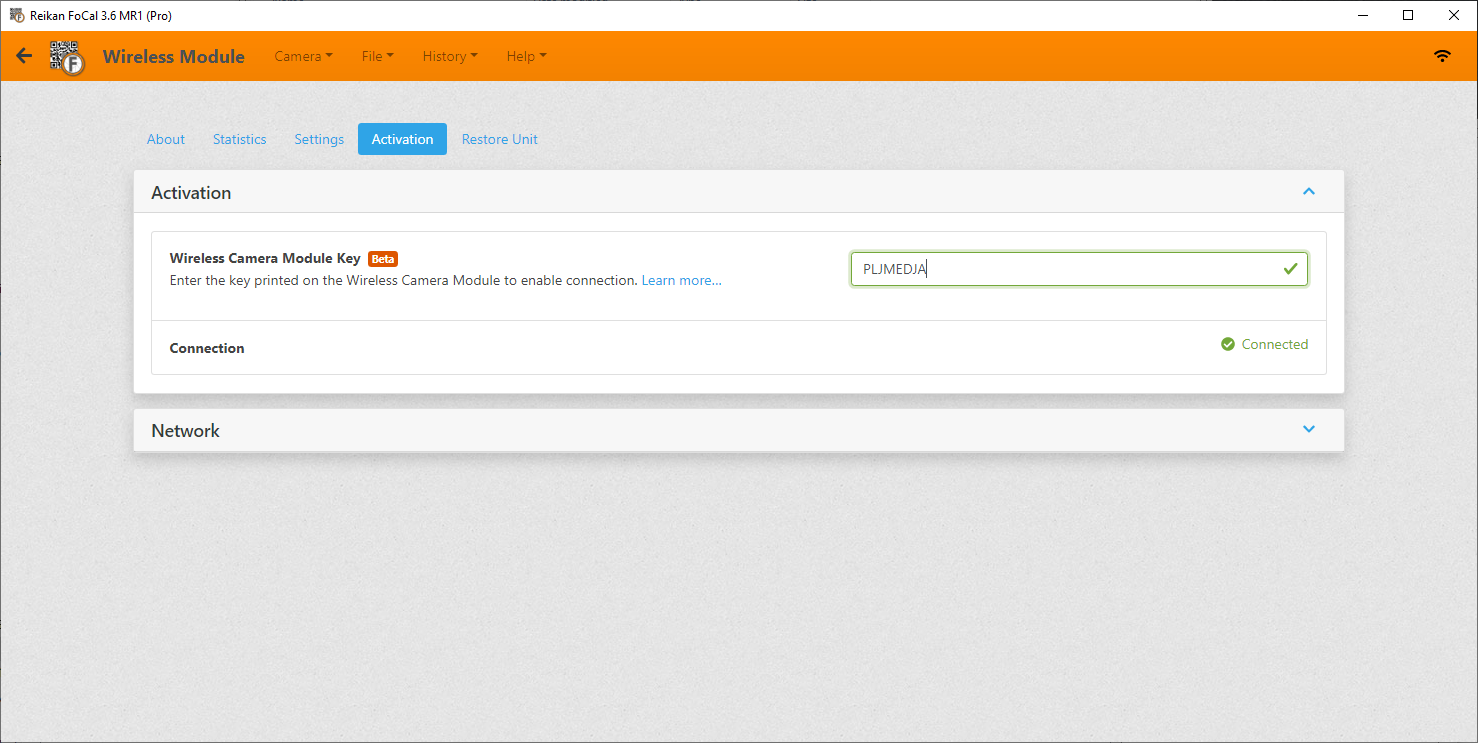
The next step is to tell FoCal about your Wireless Module.
Open the FoCal application, choose Help > Wireless Module to open the settings page:
In the Wireless Camera Module Key box, enter the CODE shown on the bottom of the Wireless Camera Module – in the image below, this is MRAWKBCP.
After a few seconds, the wireless icon should appear on the top bar of FoCal:
If the Wireless icon on the status bar is shown in red, it is most likely that you have entered the Wireless Camera Module Key incorrectly. Ensure that it is correct, and restart the FoCal application to apply the new key.
If the Wireless icon does not appear at all after entering the key, you may need to close and re-open the FoCal application.
Two extra configuration options will also appear in the Settings page (Remote Camera Interface IP Address and Port) – these should not be adjusted.
Wireless Camera Module information
Once the module is connected successfully, you can see further information about the connection and the unit itself.
Within the Wireless Module page (accessible from Help > Wireless Module or by clicking the WiFi icon on the top bar of the application), you will see extra tabs:
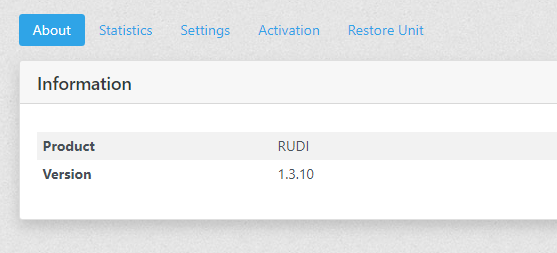
- About shows you information about the module
- Statistics shows the transfer rates, processor load etc of the module itself
- Settings allows you to change options such as the country and channel as well as restarting the module if there are issues.
- Activation is where you entered the activation key, and you can also adjust network settings here (although you should not change these away from the default values unless instructed)
- Restore Unit allows you to completely re-initialise the unit or perform a full firmware upgrade if you encounter issues where the unit will not connect or start up.
Getting Started | This Page | Using the Module