Aperture Sharpness
On this page
The Aperture Sharpness test measures how sharp your lens is at each aperture, from wide open to the smallest aperture. It shows the sharpest aperture and where diffraction starts to soften the image.
Results apply to this lens at the focal length and distance you tested. A zoom lens can behave quite differently at each end of its range.
Opening the Aperture Sharpness test
With a camera connected, choose Camera > Aperture Sharpness from the menu bar.
To analyse images you have already taken, choose File > Aperture Sharpness (if file mode is available with your licence).
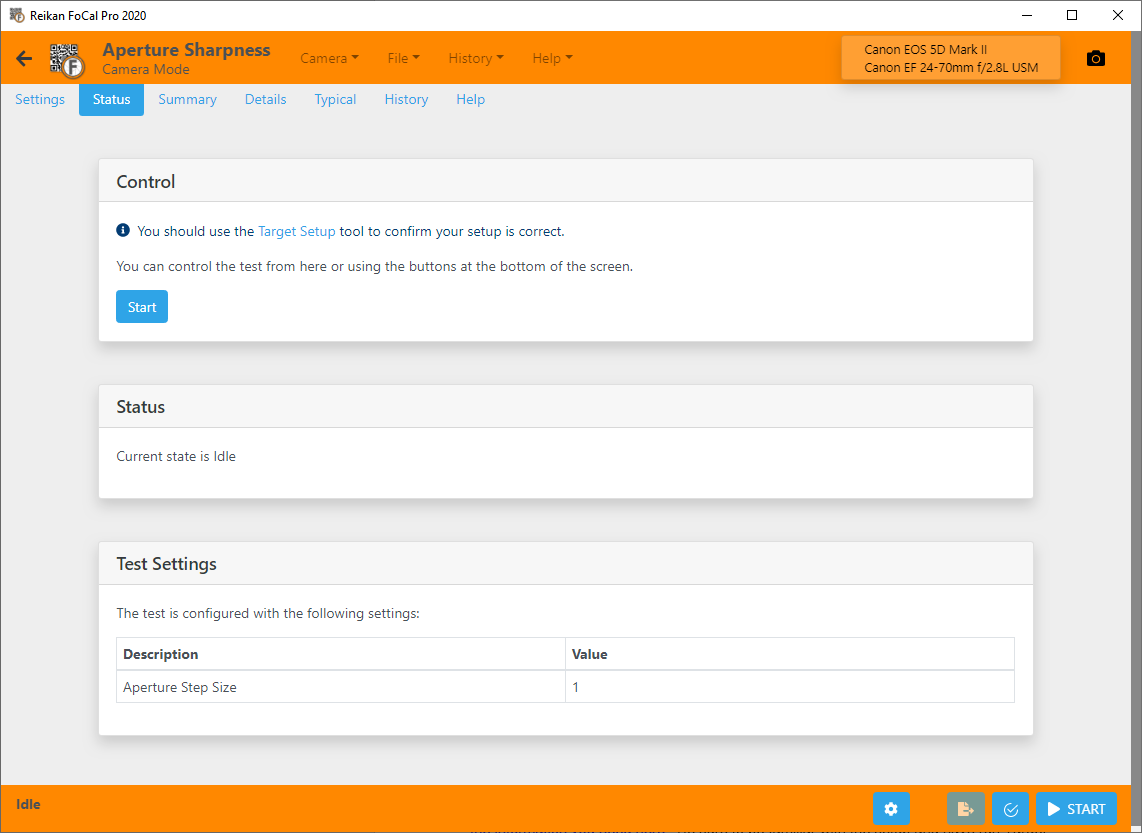
"Perfect focus" for Aperture Sharpness
Focus matters more in this test than in any other. The test doesn't refocus between shots, so if the lens isn't focused as precisely as possible to start with, every result will be low.
When you open Target Setup from Aperture Sharpness, it runs in a special mode that helps you get the best possible focus.
Follow the steps in Target Setup Utility – Aperture Sharpness before running Aperture Sharpness, otherwise your results will not be representative.
Running the test
- Put the camera on a sturdy tripod in good, steady light, aimed at the FoCal target.
- Run Target Setup from the test to check the setup and set focus (see above).
- Press Start.
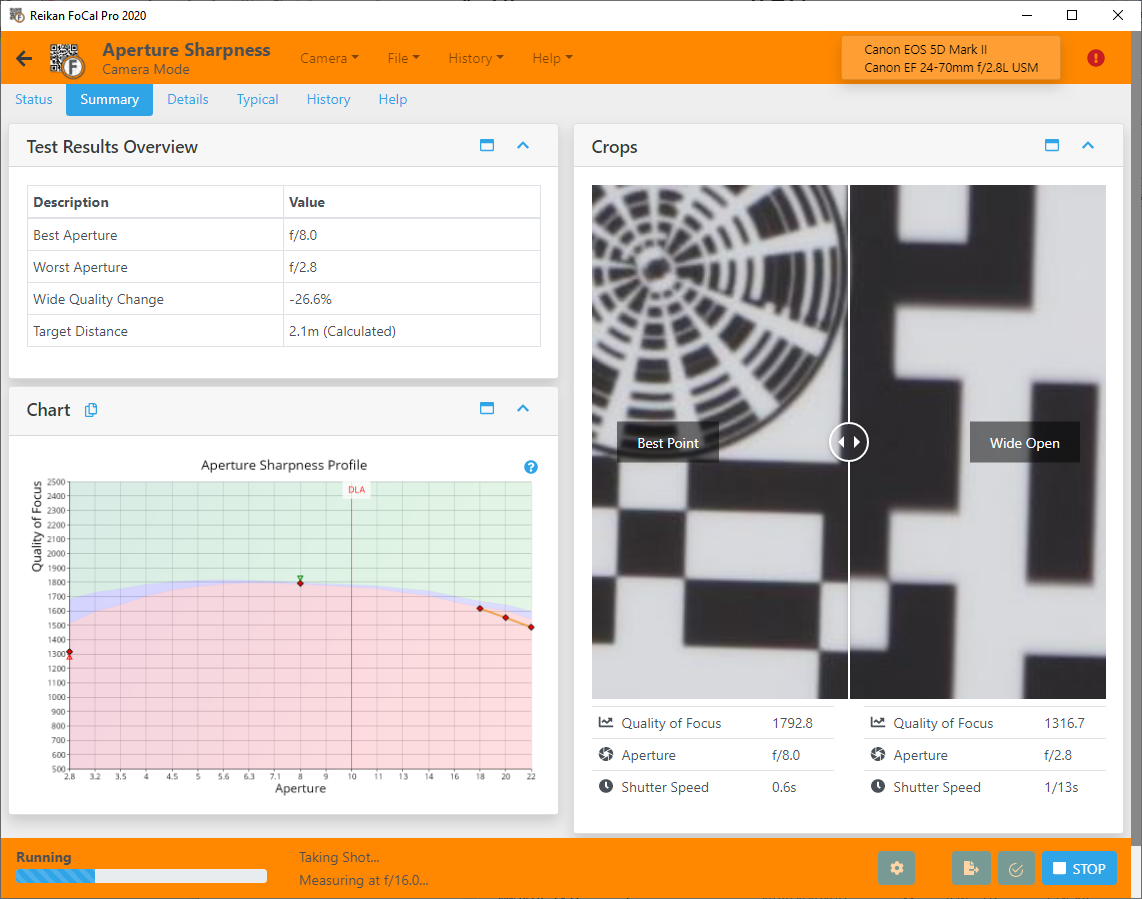
FoCal takes a shot at each aperture. The order is chosen to give useful information quickly. Within the first three shots you see the sharpness wide open (f/4 above), fully stopped down (f/22 above) and, if available, the FoCal Comparison Data bands.
Leave the camera and tripod alone while the test runs. You can look at the charts and crops during the test, but the results may change until the test has finished.
The test tabs
Some tabs only appear when the test is not running, and the Details, Scores, Compare, Report and History tabs need FoCal Pro.
Settings tab
The settings for this test. The defaults suit most people. See Settings – Aperture Sharpness.
Status tab
The current state of the test and the settings it will use. See Status Tab.
Summary tab
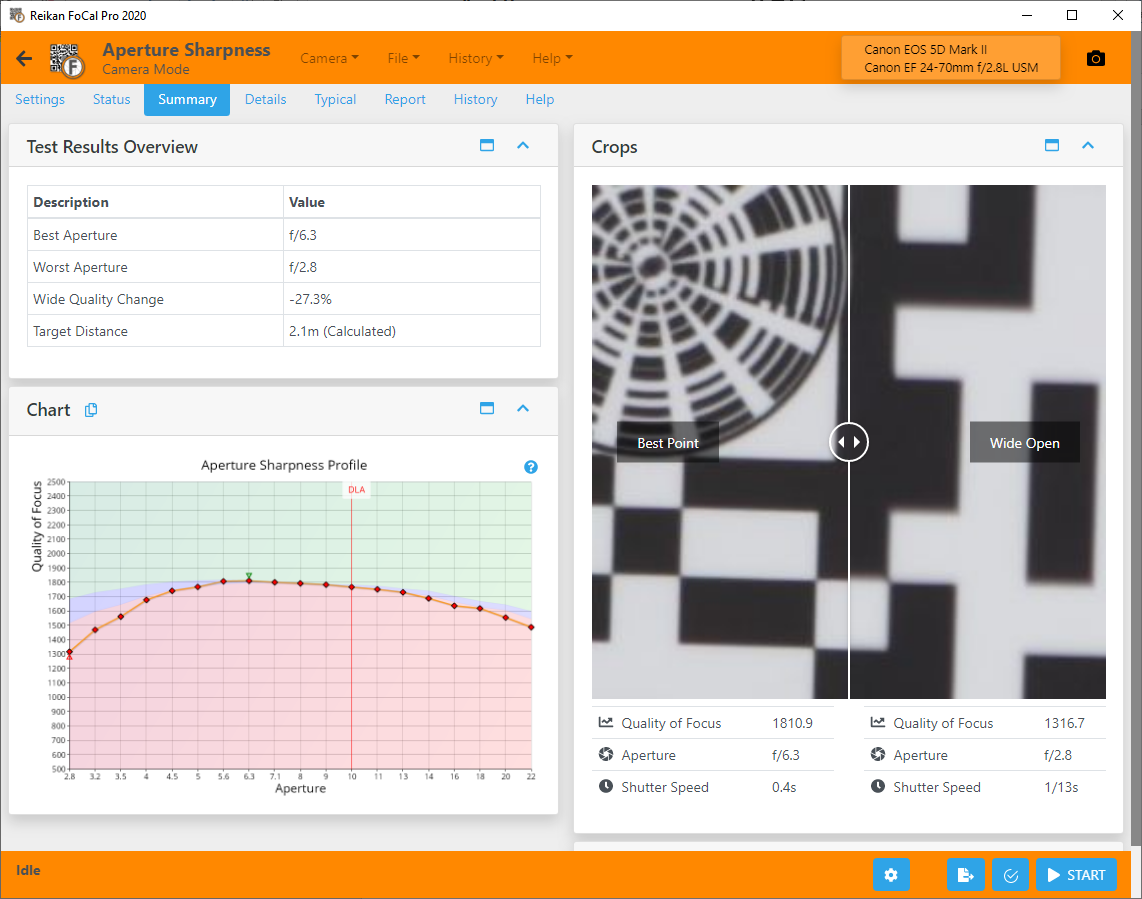
The main results (best and worst aperture, wide quality change and target distance), the Aperture Sharpness Profile chart and a crop of the target.
Details tab
- Charts showing different aspects of the measurements (see below). Choose a chart from the list.
- All the results for the test.
- A list of every shot, and the capture settings for the shot you select.
- Crops of the image, including the analysed region of the selected shot.
See Details – Aperture Sharpness.
Charts
Aperture Sharpness offers the following charts (click a link for details):
Lens Profile – Aperture Sharpness
Astigmatism Factor – Aperture Sharpness
Red-Blue Ratio – Aperture Sharpness
Red-Blue Quality – Aperture Sharpness
Comparison Data Difference – Aperture Sharpness
Image Motion – Aperture Sharpness
Corner Brightness Profile – Aperture Sharpness
Dual-Pixel Raw Focus Offset – Aperture Sharpness
The Image Motion (2D) chart shows the same movement as the Image Motion chart, as a path across the sensor. The Dual Pixel Raw chart only appears for Dual Pixel Raw tests.
Scores tab
Each result as a score from 0 to 100, grouped into Overall Results, Quality and Optical Quality. Where FoCal Comparison Data is available, the score shows how your result compares with other users of the same camera and lens.
Compare tab
How your results compare with other users of the same camera and lens, using FoCal Comparison Data. See Compare Tab.
Report tab
Save a PDF report of your results, or a CSV file of the numerical results for your own analysis. See Report Tab.
History tab
Previous tests with the same camera and lens, with a summary of the results. Double-click an entry to open it, so you can see how your equipment has changed. See History Tab.
Help tab
An overview of the test and how to run it, with a link to this online help.