Stabilisation Test
The Stabilisation Test measures how well your lens or camera image stabilisation works. It takes groups of shots across a range of shutter speeds with stabilisation on and off, handheld and (optionally) on a tripod, and compares the sharpness.
The Stabilisation Test needs FoCal Pro.
For a short overview, watch the Stabilisation Test video.
Opening the Stabilisation Test
Choose Camera › Stabilisation Test, or click the Stabilisation Test card on the Camera page.
Before you start
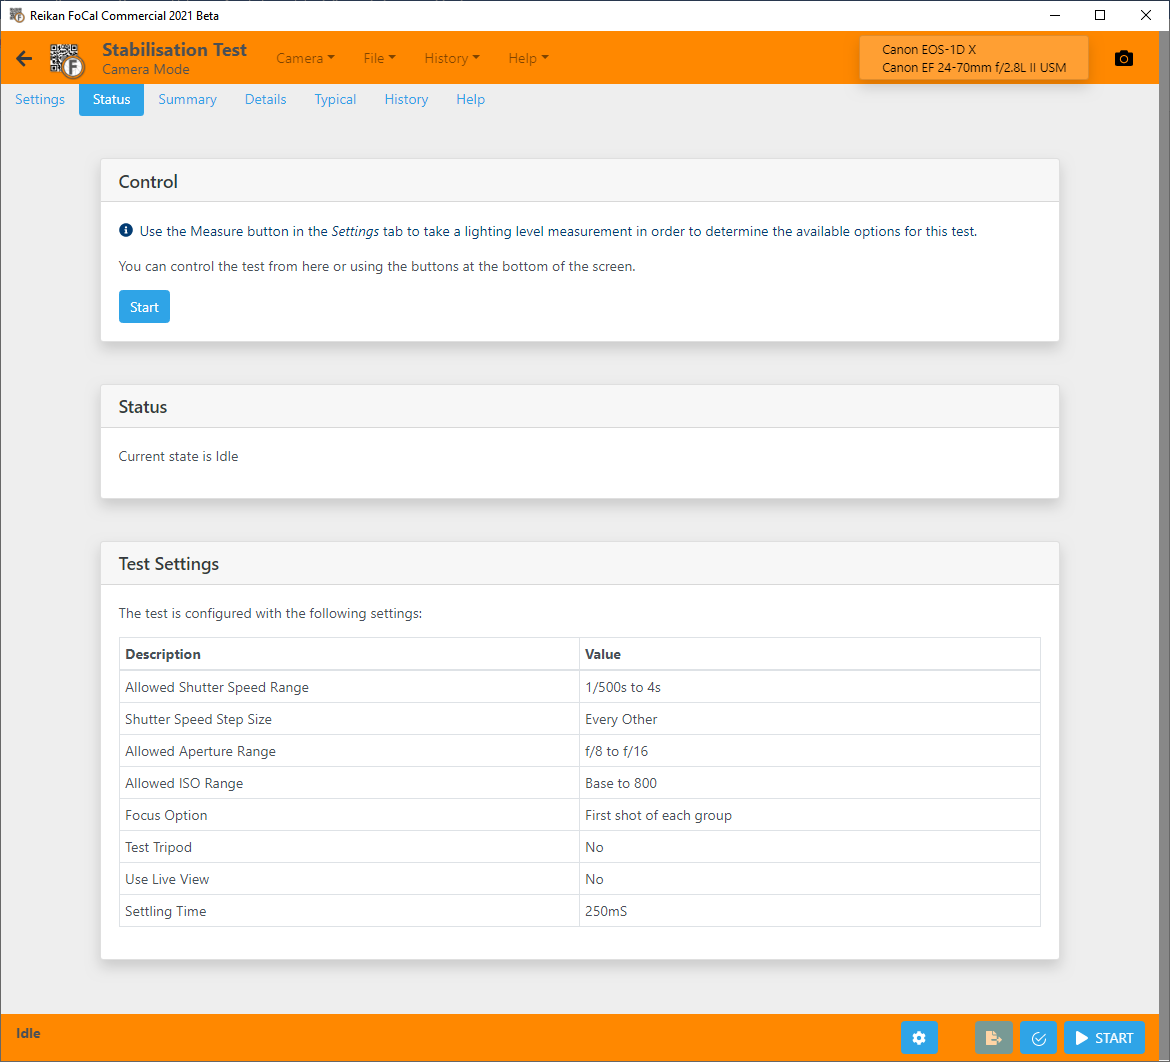
The Stabilisation Test is set up differently from most FoCal tests:
- Put a memory card in the camera with room for at least 25 full-size JPEG images. On Canon cameras, opening the card door switches the camera off, so reconnect it to FoCal after inserting the card.
- Set the camera to M (manual exposure) mode. If you forget, FoCal will tell you.
- Measure the lighting with the Measure button (see below), so FoCal can work out which shutter speeds it can test.
Measuring the lighting
Open the Settings tab.
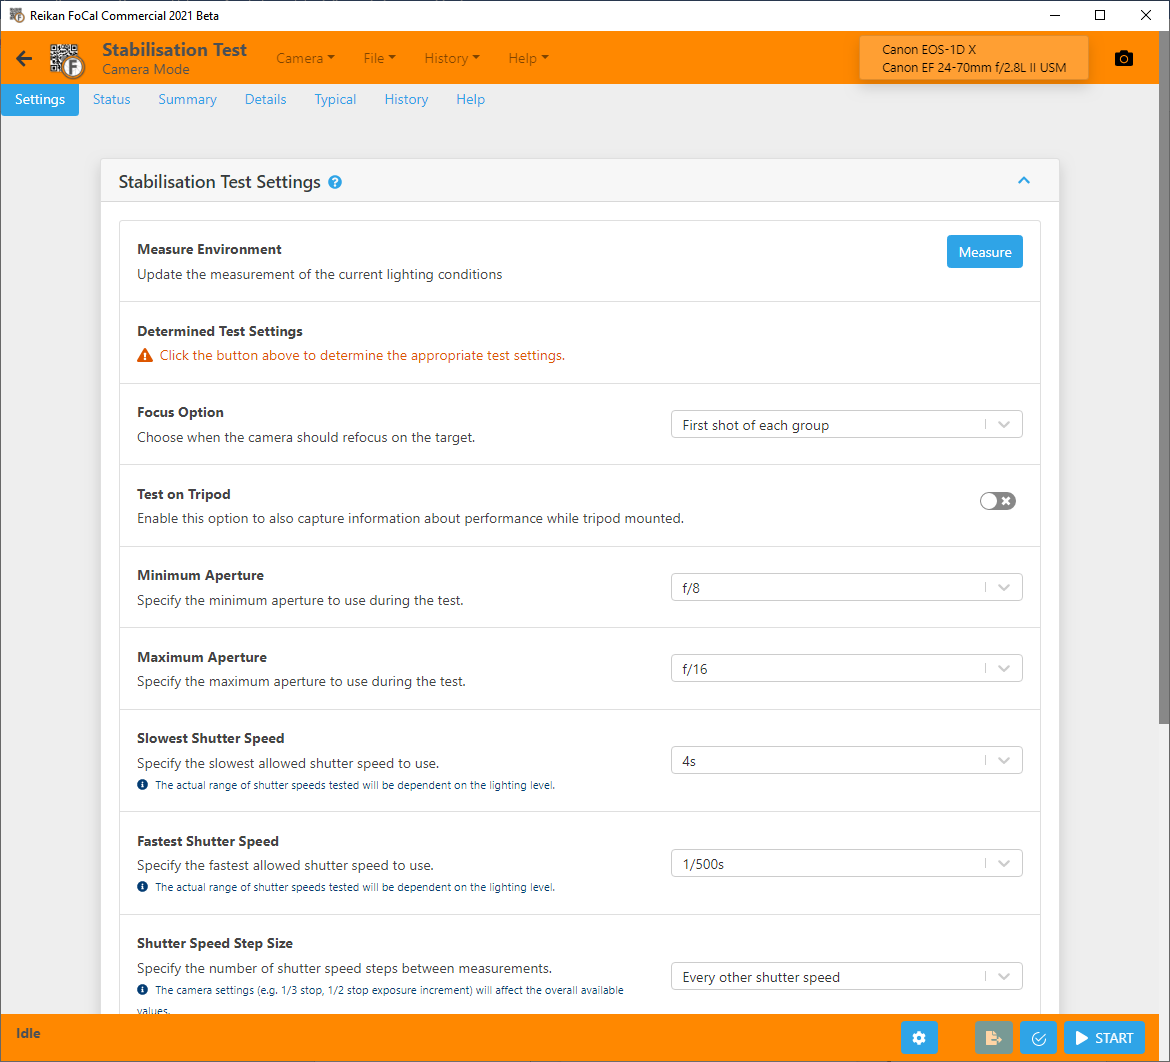
Click Measure. FoCal shows this message:
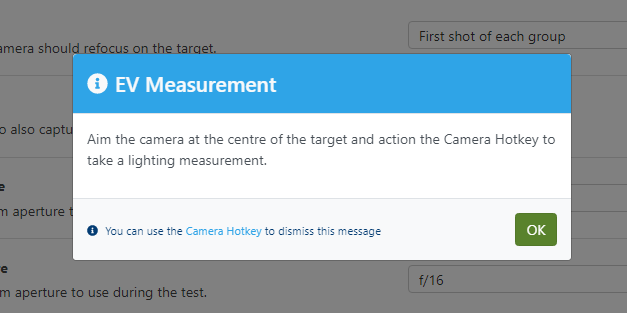
If Test on Tripod is on, you can mount the camera on the tripod now. Otherwise, hold the camera.
Using the viewfinder or the camera screen, put the centre focus point roughly over the centre of the target.
Use the Camera Hotkey (usually one click of the aperture or shutter speed dial), or click OK on the message.
After a couple of seconds you'll hear the pre-shot alert (beeps) and the camera takes a shot. FoCal measures the light and lists the shutter speeds it will test with the current settings:
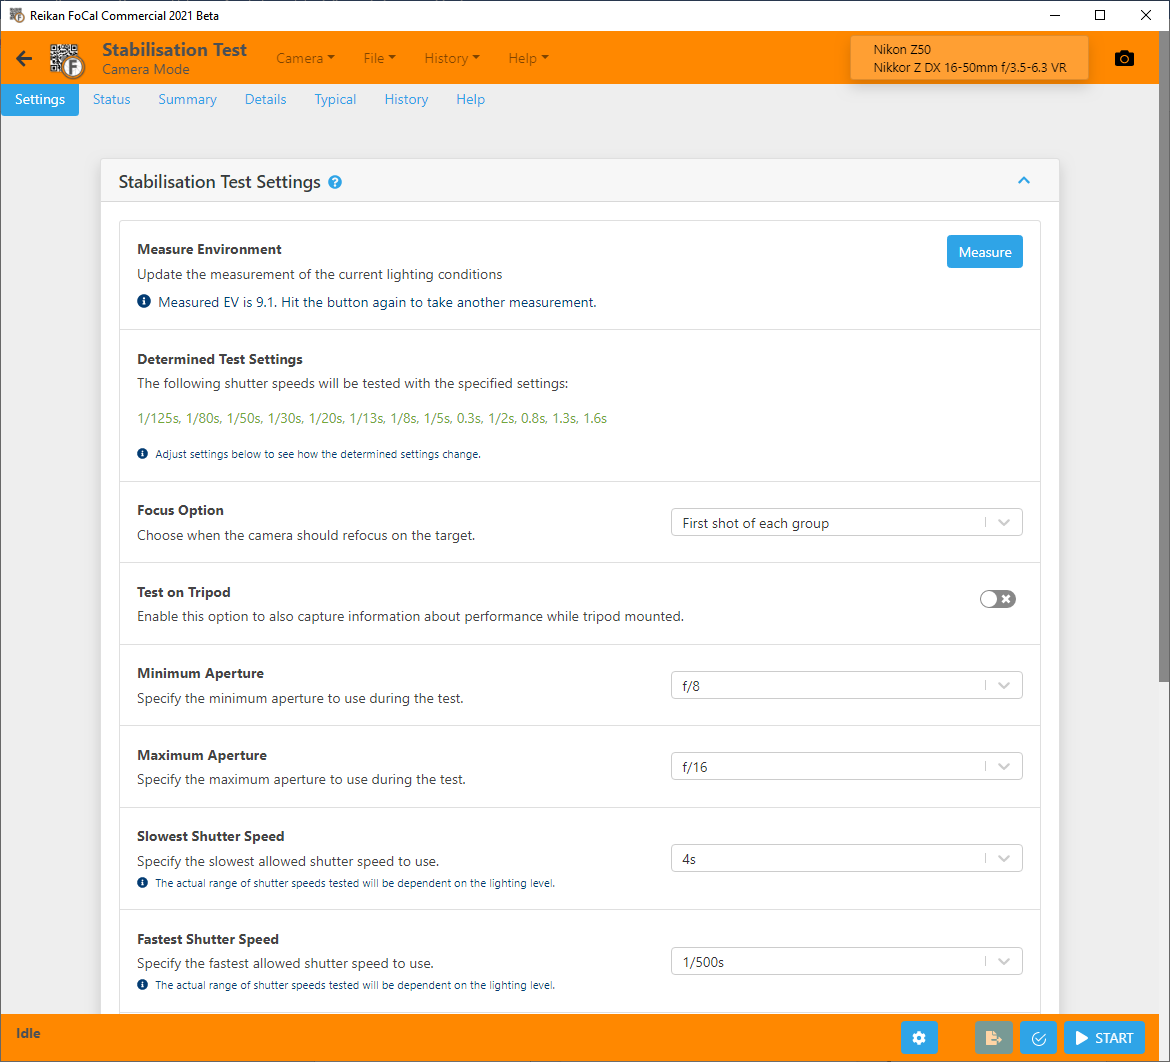
The example above is a good set of shutter speeds. Stabilisation usually starts to help at around 1/125s and keeps helping down to around 2s.
Adjusting the shutter speed range
If the range isn't where you want it:
- More light on the target moves all the shutter speeds faster. In the example above, more light would add 1/200s, 1/250s, 1/500s and so on, but the slowest speed might become 0.8s or 1/2s instead of 1.6s.
- Less light on the target moves the shutter speeds slower.
- A wider aperture range gives more shutter speeds. We don't recommend apertures wider than f/8 (such as f/5.6 or f/4): the depth of field becomes shallow, and focus changes can spoil the results.
- A higher maximum ISO also gives more shutter speeds, but noisy images can give misleading results. Keep older cameras to ISO 800 or below; newer cameras may be fine up to ISO 1600 to 3200.
If you change the lighting, click Measure again to update the list.
See Settings – Stabilisation Test for all the settings.
Running the test
- Click Start on the Status tab or in the footer bar.
- If Test on Tripod is on, the first groups of shots are on the tripod. Follow the instructions to mount the camera and turn stabilisation on or off. To take each group, use the camera hotkey or click OK on the message.
- When asked, hold the camera as you normally would to take pictures: up to your eye, keeping the centre focus point over the centre of the target throughout.
- Use the camera hotkey to start each group. After a second or so you'll hear the pre-shot alert, and the camera takes a batch of shots. A chime from the computer tells you the group is complete.
FoCal transfers and analyses the images while you shoot, so the results may take a little while to appear after the last shot:
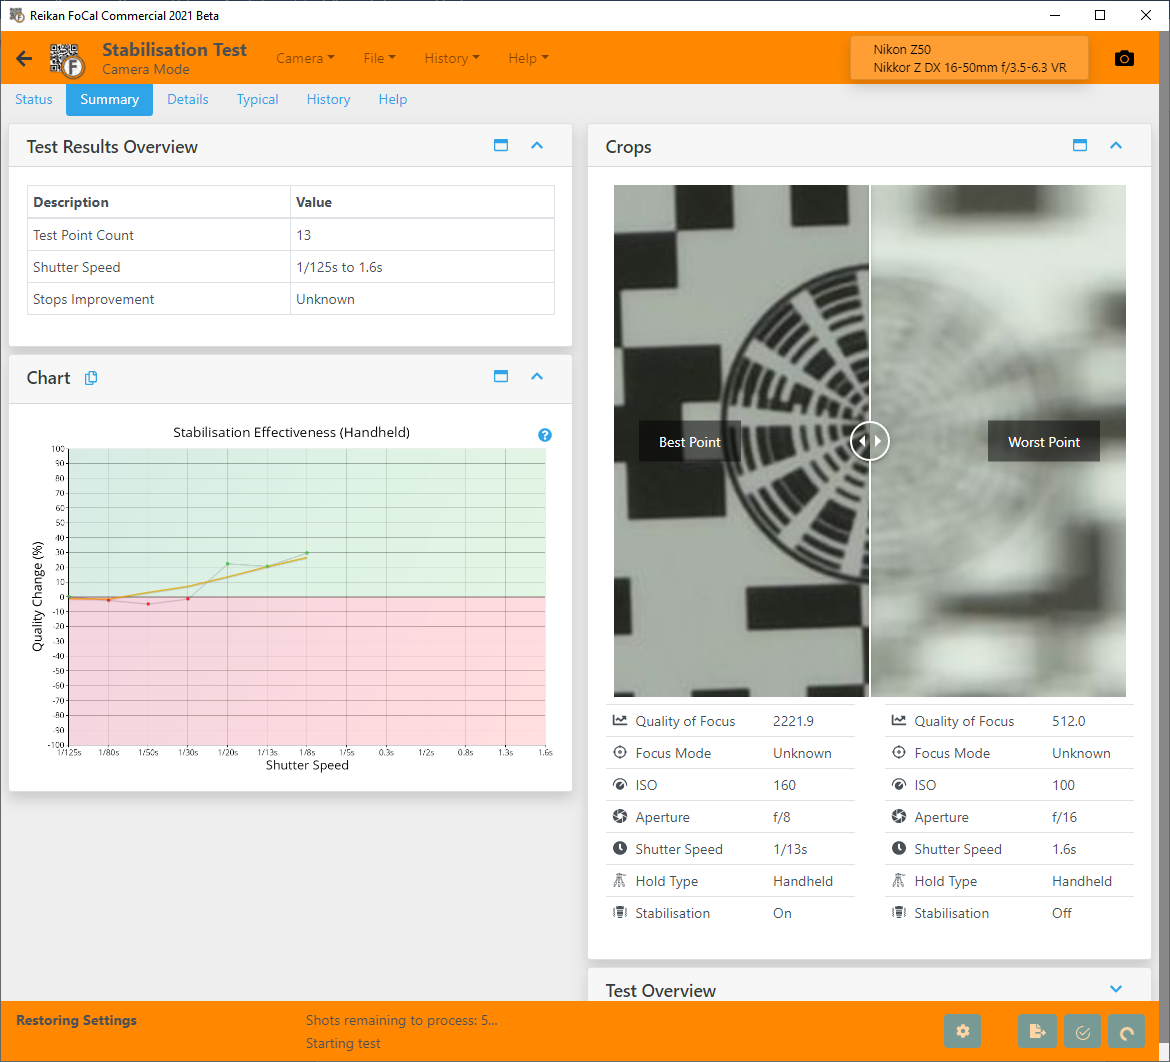
Reviewing the results
The Summary tab shows the main results.
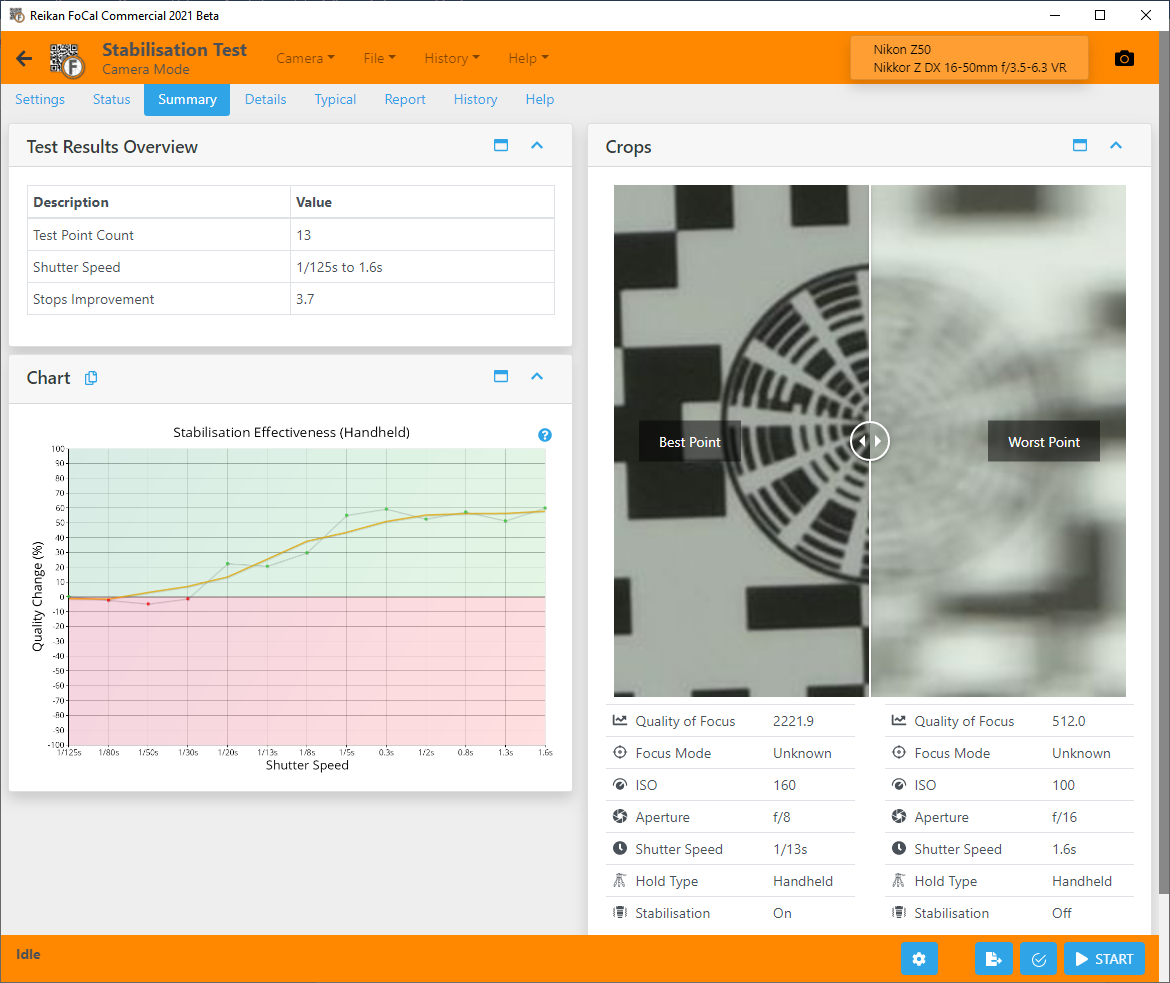
- Test Results Overview: the key results, such as the range of shutter speeds tested and, if available, the stops of improvement.
- Chart: the Stabilisation Effectiveness (Handheld) chart, showing when and how much stabilisation improves the image. The copy button in the title bar copies the chart to the clipboard.
- Crops: a comparison of the best and worst images. Drag the slider left and right to compare them. Some measurements are shown under each side. Use the maximise button in the title bar to make the card larger (this works on any card with the button).
- Test Overview: basic information about the test, such as the camera and lens used.
The Stabilisation Test gives a lot of information. See Details – Stabilisation Test for what each result means.
The other tabs
Settings tab
See Settings – Stabilisation Test.
Details tab
The Details tab has:
- a choice of charts showing different aspects of the measurements (listed below)
- the detailed results
- a list of every shot, with general information
- the capture settings for the selected shot
- crops of the selected shot, including the analysed region.
See Details – Stabilisation Test for more information.
Charts
The Stabilisation Test has the following charts. Most come in a handheld version and, if you tested on a tripod, a tripod version. Click a link for details:
Handheld Effectiveness – Stabilisation Test
Tripod Effectiveness – Stabilisation Test
Tripod/Handheld Difference – Stabilisation Test
H/V Ratio – Stabilisation Test
Absolute H/V Ratio – Stabilisation Test
Absolute H/V Ratio Difference – Stabilisation Test
Stops Improvement – Stabilisation Test
Image Motion – Stabilisation Test
Image Motion 2D – Stabilisation Test
Scores tab
The Scores tab shows the main results as scores from 0 to 100.
The Stabilisation Test has no Compare tab, because there is no FoCal Comparison Data for this test.
Report tab
The Report tab saves a PDF report of your results. You can also save a CSV file of the numerical results for your own analysis.
See Report Tab for more information.
History tab
The History tab lists earlier Stabilisation Tests with the same camera and lens, with a summary of each result.
Double-click an entry to open it, so you can review earlier results and see how your equipment has changed.
See History Tab for more information.
Help tab
The Help tab gives an overview of the test and how it works, with a link to this online help.