Calibration Check
On this page
Is your calibration still right? Calibration Check finds out in a few minutes, without changing anything on the camera. It compares the camera's normal autofocus shots with a carefully focused reference shot, and tells you how close to perfect your autofocus is.
It needs no input from you while it runs, and it also works with cameras that have no focus adjustment setting.
Use Calibration Check between your monthly full kit checks: before an important shoot, or after a lens has had a knock. If it shows a problem, run a full calibration.
Opening Calibration Check
With a camera connected, choose Camera > Calibration Check from the menu bar.
Setting up
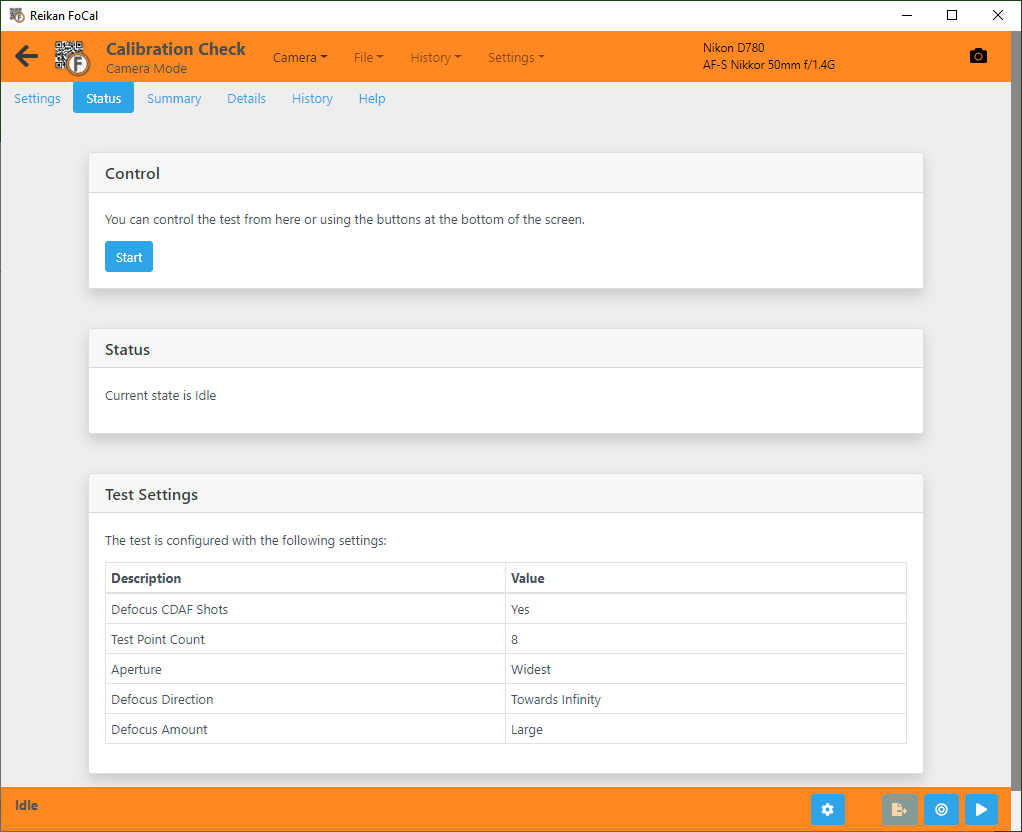
The camera and target must be set up correctly. Run Target Setup first and clear any errors (all the information you need is here). You can open Target Setup from the button on the test footer bar or from the Camera menu.
Then make sure the autofocus point is set to the centre point, both for the viewfinder and for Live View:
- Look through the viewfinder and set the focus point to the centre point. You may need to change the focus mode to single-point to set the position.
- Start Live View and set its focus point to the centre too. Again, you may need to change to single-point mode.
Note: some cameras won't start Live View while connected to a computer (for example, Nikon DSLRs). If Live View won't start, stop the test, disconnect the camera, set the Live View focus point with the camera disconnected, then reconnect and run Calibration Check again.
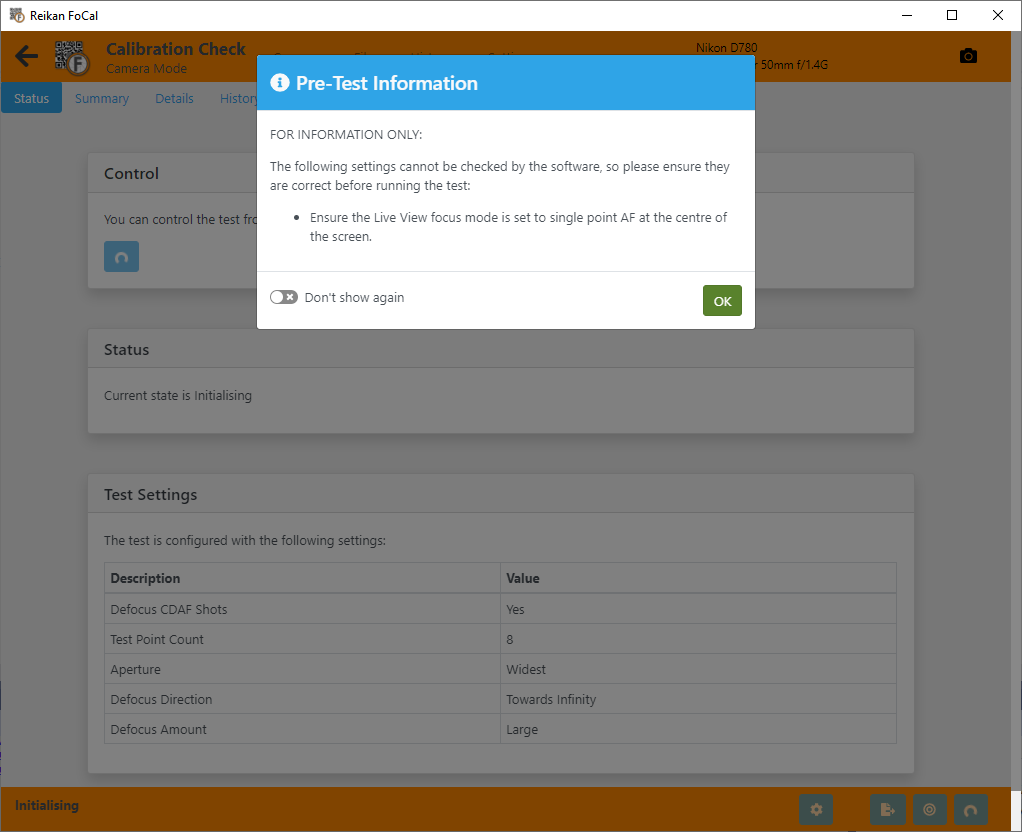
When the test starts, FoCal reminds you to set both focus points to the centre. It does not check this, so make sure you have done it, otherwise the results may be wrong.
Running the test
Press Start on the Status tab or on the test footer bar.
The test needs no input from you and takes a few minutes. Leave the camera and tripod alone while it runs. The results update as the test goes on.
Reviewing the results
The Summary tab shows the essential results:
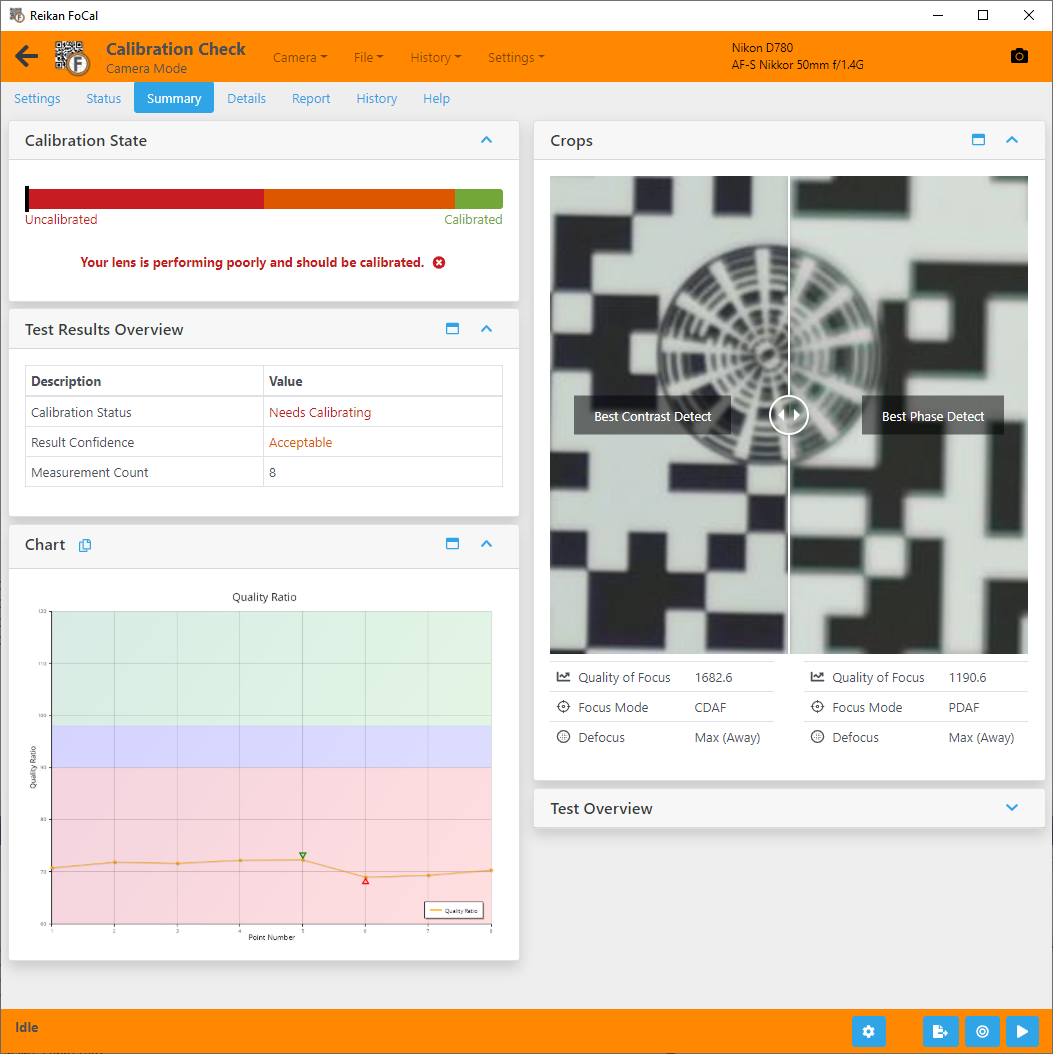
Autofocus System Performance
The main result. A bar runs from Poor Performance on the left to Excellent Performance on the right, with the verdict below it:
- Calibrated: Focus Performance of 90% or more. The autofocus doesn't need calibrating.
- Worth Checking: 59% to 90%. Acceptable, but calibrating is likely to improve your pictures.
- Needs Calibrating: below 59%. Run a full calibration.
- More Data Required: there aren't enough measurements for a result yet.
Over 100% means the autofocus beat the reference shot. That's good news, but FoCal can't then say exactly how good.
Test Results Overview
The calibration status, the Result Confidence (how consistent the measurements were) and the number of measurements.
Chart
The Result Progression chart shows how the result built up during the test. Each point is the overall Focus Performance using only the measurements up to that point. The green band shows the confidence in the result so far. The background colours are the same as on the Autofocus System Performance chart. The result should settle as the test goes on.
Crops
A typical autofocus shot (Representative Measured) and the best reference shot (Best Reference), side by side. Slide the bar left and right to compare them. Some measurement values are shown below each side. To make a card larger, use the maximise button at the top of the card.
Test Overview
Basic information about the test, such as the camera and lens used.
Interpreting the results
The example above shows a lens that needs calibrating:
- The performance bar is towards the left, and the verdict says the lens needs calibrating.
- The result line on the chart is in the red area.
- Under the crops, the autofocus shot's Quality of Focus (1306) is well below the reference shot's (1956).
Compare this with the same lens after calibration:
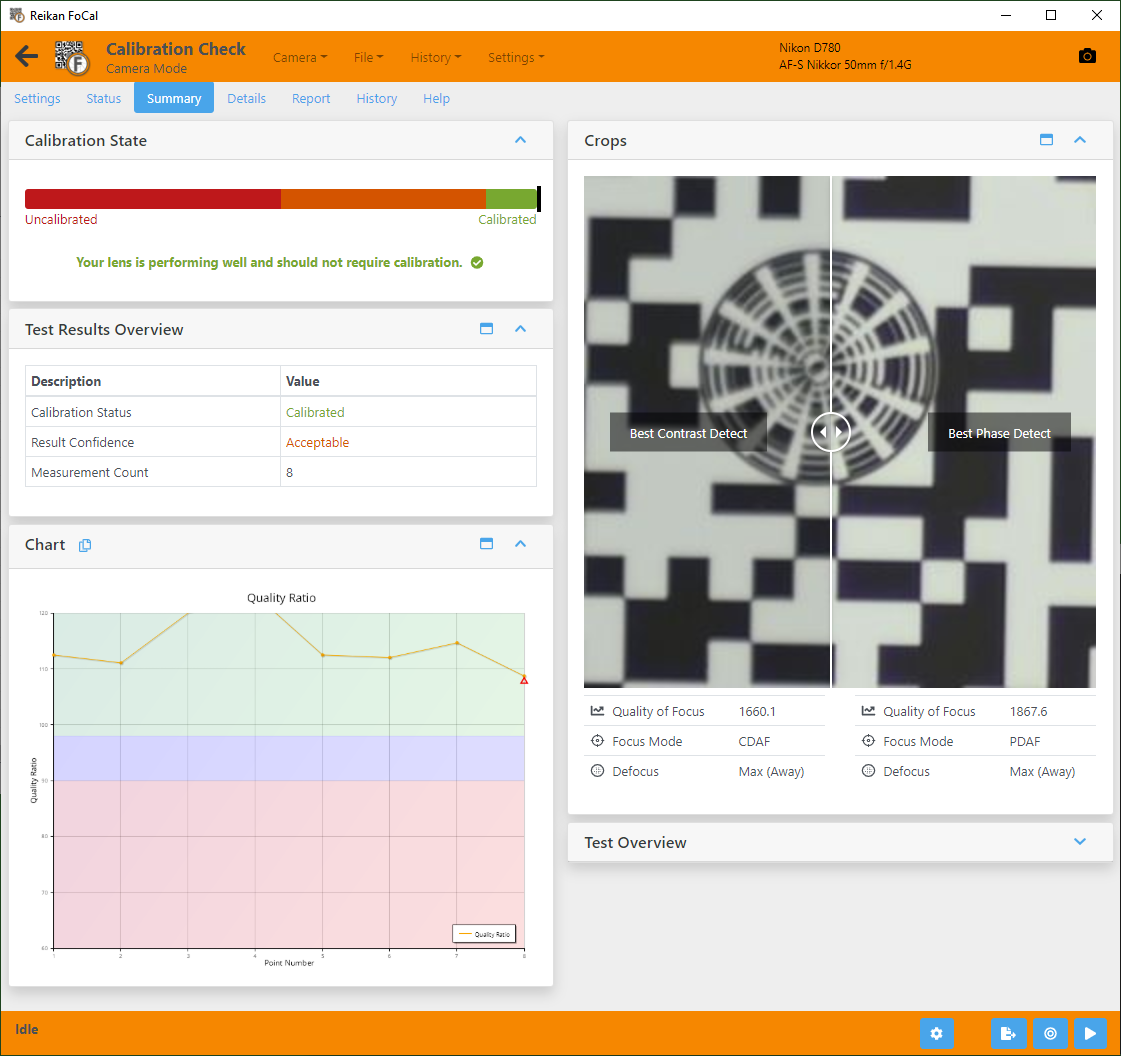
- The performance bar is towards the right, and the verdict is Calibrated.
- The result line is in the green area.
- The autofocus shot's Quality of Focus (1912) is close to, or above, the reference shot's (1956).
The test tabs
Some tabs only appear when the test is not running, and the Details, Scores, Compare, Report and History tabs need FoCal Pro.
Settings tab
See Settings - Calibration Check.
Status tab
The current state of the test and the settings it will use. See Status Tab.
Summary tab
See Reviewing the results above.
Details tab
- Charts showing different aspects of the measurements. Choose a chart from the list: Autofocus System Performance – Calibration Check, Quality Value – Calibration Check and Result Progression.
- All the results for the test.
- A list of every shot, and the capture settings for the shot you select.
- Crops of the image, including the analysed region of the selected shot.
See Details - Calibration Check.
Scores tab
Each result as a score from 0 to 100, grouped into Overall Results, Quality, Optical Quality and Further Details.
Compare tab
How your results compare with other users of the same camera and lens, using FoCal Comparison Data. See Compare Tab.
Report tab
Save a PDF report of your results, or a CSV file of the numerical results for your own analysis. See Report Tab.
History tab
Previous tests with the same camera and lens, with a summary of the results. Double-click an entry to open it, so you can see how your equipment has changed. See History Tab.
Help tab
An overview of the test and how to run it, with a link to this online help.